Thursday, October 27, 2016

Quick Update


I'm not dead. I just haven't had any share-able projects so far, nor did I do much work on my project backlog. I did advance some things here and there, but work and school is killing me taking all my time at the moment.

Here's what I can share!

They're cleaning the warehouse at work, and I got to go home with a few interesting items. Some I will disassemble at some point...but first here's a box:

If only I could rotate pictures...
That I refinished.


Much nicer. According to the black tag, it used to be used for a Collimator that was probably used to check for planarity of big surfaces.

Not shown on the picture, but the box was all mangled. The tape was literally holding it together! As soon as I removed all of it, the bottom and the back fell right off. The front was fine though, so there was no need to tow the box outside of the environment. Nothing epoxy can't fix.

I also tried my hand at sewing for making a parachute for the rocket club at university.


This...stitch? Folding method? Thing? Is based on AC43.13, the FAA advisory circular for aircraft repair. The start of it is pretty ugly, but it holds together quite well. This is a great experience that will elevate my cosplay making skills to new levels!...that is, level one hopefully...because I haven't finished a single cosplay yet...

Speaking of cosplay, I finally grew a pair and added the molded and 3dprinted pieces to Dark Repulsor...now I only need to add details to the handle...and paint it. Haven't taken pictures though...I really need to get better about that.


Sunday, August 7, 2016

On sourcing components and tools

One of the hardest parts of any project is finding just where to get the pieces you need. Americans have it easy thanks to McMaster Carr, which, if you're lucky, will offer same day delivery (looking at you Charles <.<) or Amazon Industrial. None of those ship to Canada....except to existing customers in the case of McMaster.

So, how do Canadians get supplies to make...well, anything? It depends what you need, and how quickly you need it.

Most of the sources are included in the materials sources on my side-bar, but I thought it would be a good idea to make an actual post about it. I'm not paid to write about any of this. If you have other sources, feel free to leave them in the comments!

I'm in no Hurry and I don't REALLY care about quality

Ebay and various direct-from-china websites have everything you need, including a jet engine or two, probably. Thing is, you're pretty much guaranteed to wait at least a month for it (even if the ebay estimated delivery says in 2 weeks, it lies), and then 1 or 2 out of every 3 items might not work, or work a very short time, or get to you broken. I used to also buy from Aliexpress, but they don't accept paypal anymore... and i'm not ready to give my creditcard number to china just yet.

I want quality stuff/I need it in less than a month

If you want electronic parts, the regular American sites do ship to canada. Sparkfun, Adafruit, and Pololu are all very good sources...Adafruit and Pololu in particular since they have tutorials. Not only that, but the usual, more engineering-oriented sites work too. Digikey has a canadian website (Digikey.ca), and element 14/Newark ships to canada.

For electronics, Canada has a few shops of it's own too. Robotshop and SpikenzieLabs, for instance, are both based in the Montreal area.

If you need anything related to RC, motors, batteries, and such, Hobbyking's where you'll want to go. Their parts have been used in everything, from silly go karts, to Battlebots, to powering, and then blowing up with, MIT's rocket (not the batteries fault. after 4 tries you'd think they'd find out how to do a proper recovery...) I know some people wouldn't consider Hobbyking to be quality, but it's really the middle ground between very expensive quality and cheap piece of crap.

If you want mechanical parts...well, good luck. Misumi USA does ship to canada (along with being VERY expensive. 67$ for a 250mm long 8mm leadscrew with 2 starts? i'll buy 4 from china and hope one is actually straight and made of metal, and only pay 30$ TYVM) and when you really need it it's there. Surplus Center ships to canada, and also kind of have a Canadian equivalent called Princess Auto. Fastenal is there for all your fasteners needs and is getting more and more products trying to compete for the hole McMaster left in the canadian sources, as is Ackland-Grainger.

Also, amazon.ca has some stuff.

I don't need no electronics or tools, I need raw materials!

Getting raw materials in canada is so hard, unless you're a company, or willing to pay (and have the space to store) 1000$ worth of steel or aluminium at once, no metal selling companies will want to talk to you. Some machine shops do sell in small quantity, but in my experience they tend to see you as a nuisance more than anything else.

Enter Online Metals. Want 0.5" titanium plate? You got it! Need C385 brass flat bars? got that too! Tool Steel? of course! 1100 Aluminium? Unless you want to make something out of actual Inconel, they'll have everything you need. While they have aluminium, I wouldn't recommend using them for aluminium. Instead, go to Aircraft Spruce. Because they are canadian, they don't have the antidumping tax american companies (like online metals) might get hit with. They are also a good source of carbon fiber, glass fiber, and epoxy. Both also sell plastics.

If you don't need wide sheets of metal, Sidecuts might be a cheap source too.

I want cosplay/Artsy stuff

Canada has a good source of cosplay supplies, although I can only really mention the ones I've used.

Sculpture Supplies is my source of Smooth-On products, but they have everything related to sculpture; tools, materials, Worbla. But finding something on their website can be hard sometimes if you don't know the exact name of the product you're looking for.

If you want EVA foam, there's only one place that sells REALLY great EVA foam. TNT cosplay! (they also have Rytlock Brimstone on their main page, so why WOULDN'T you want to buy from them?)

I want...information

Then go look at websites! Try finding blogs or youtubers that happens to do something related to what you want to do.

Charles Guan
Bill Doran
Kamui Cosplay
Evil Ted Smith
Jimmy Diresta
Clickspring
Dan Gelbart
Matthias Wandel


Friday, July 1, 2016

On rocket launches, internship, and electronics.

As some of most of you know, I'm a member of the GAUL, the "Groupe Aérospatial de l'Université Laval"...or the Laval University Aerospace Group, but then LUAG doesn't sound good...and LUA group sounds more like a programming language group...anyway.

Way back in...erm, May? Right after the finals, we finalized the rocket's design and started building it. Being in the aerostructure team, aka 'Mech E. guys that talks about Reynolds and Young' I volunteered to help build the structure, and, thanks to the help of my spray paint expertise 'Shakes fist at Elucidator', paint it in time for the reveal at the Montreal Cosmodome.

Our initial design for the structure was supposed to be a tube with 2mm thick wall made of carbon fiber. That sizing was done considering that the rocket's most important stress was in compression, at ignition. Which means that the carbon fiber...fibers only took away from the strength of the epoxy because fibers are only good in tension. Sadly, we didn't receive our carbon fiber on time, and had to do with glass fiber. Since that wasn't what we did our design calculations with, we went very conservative and decided to have a more traditional design: an inner cardboard tube, with 2 layers of glass fiber, and 2 layers of carbon fiber we had lying around.

Structurally, this is a beast. Weight-conservation wise...erm, let's not talk about it.

The only picture of the structure before it was painted

Once that was done, I also 3D printed parts for the payload team. Here's the structure for a fiber-optics gyroscope. That was easily the biggest single part I've printed so far!
A gyroscope or a plasma grenade?
Then came a rushed paint-job to have something ready for the unveiling of every Quebec team participating this year. then stripping it and making a good paint job. Doing that I've learned a few things:


  • Sanding is a pain.
  • Fiberglass is a pain to finish.
  • Some canned paint don't play well with each others, and sometimes even with itself (Krylon colomaster white, i'm looking at you).
  • Sanding after your paint screwed itself is a pain.
  • Using water-based fillers (like wood filler) is a BAAAD idea. They soften once they get painted on, and they stay soft. THAT'S why cosplayers use Bondo or Quick Seal
  • Sanding after your filler didn't stick on the rocket anymore after painting it is a pain.


But in the end, we ended up with something semi-decent (and which I didn't take pictures of)
The only picture I have 
And almost immediately after, OFF WE GO! We went with 2 rental cars and a van. We followed each others until the American border at Sarnia. We all went through one after the other, but somehow one of the team missed the restaurant WITH THE GIANT 60-foot american flag, and so after the border we just went.

The giant 60-foot american flag one of the cars managed to miss...

The drive as a whole was quite boring. One person drove, another person co-piloted, and the last one was sleeping in the back, rotating each roles every 6-8 hours...so it's also a blur. I took a few pictures of the...like...3 interesting thing we saw on the way.

I must say I was expecting the Mississippi to be...larger. Took near Davenport. Maybe it gets larger farther south?
Surprisingly small.
It was also my first time seeing the rockies.

Took near/in Denver, Colorado
My sub-team got there first! We took 44 hours, including the one time we stopped to sleep. We even beat the guys who flew to Salt lake city. Then we started working on the integration of he electronics and the payload.

And there it is! The payload is in the payload bay! and finally we can drill the holes for the nose cone. 2 weeks later than I would've liked, but oh well.

And now the competition! We're launching far away from town...like 30 minutes away, in the middle of the desert. Well, 'Desert'. That was way more green and alive than I was expecting. But then we also got a few dust devils...so meh.

Base Camp,. you can see the launch rails if you squint real hard.


Our launch went pretty well! Beside the...erm...structural integrity problem where, when our drogue chute deployed, the sheer pins holding the main also blew (oops) and thus our main deployed near apogee. That made the rocket go really far. When it landed, it also dragged on the ground for like 400~500 meters because of our gigantic chute and the high winds.
You can see the mark of the rocket dragging on the ground.
We ended up in 4th place, and our fiber optic gyroscope got an honorable mention!

Then we went and visited the Arches national park. If you're ever in Utah, GO THERE! it's so beautiful.


Internship

While construction of the rocket started, I started working at Lortie Aviation as an intern. They own a fleet of 16 Hawker Hunters. My job there is to update drawings and support the avionics department.

Some Hawker Hunters

As a student in mechanical engineering who also enjoy some electronics, and who realize that, thanks to robotics, even mechanical engineers will have to learn some electrosities...and a follower of weird battlebots #Overhaul2, oh, also, jets?!

This is like a dream internship! I get to see jet engines being overhauled, and the very important links between electrical and mechanical systems...or between any systems for that matter. While I've worked on 'complex' projects before with FIRST and SAE Aero Design and Gaul...most systems were...mostly independent.

Oh, I also learned circuit and PCB design is a pain, you have to take way too many things into account (Thermal Management, Power Dissipation, Electromagnetic Interference, Noise in general, filtering, coupling, impedance matching, breadboarding, timing...) , many of which is hard to account for before your prototype is actually built and then you have to start over with that new information...and then making that prototype you've probably released the magic smoke on a few components (50$ DAC here ._. among other things).

Sincerely, if you know an EE...hug them, they deserve it.


SPARC Standard rules

Translations are coming soon(tm). I severely overestimated the time it would take to translate, and my free time. They should be ready by the end of the year (probably).

Friday, April 29, 2016

Adventures in 3D printing, and the end of the semester.

3D printing

As I mentioned in my last post, I ordered a 3D printer off Monoprice's Ebay page. They had a very nice deal: a prusa i3 clone for only $309, or, shipped and taxed and everything, 478 canadian pesos.

The printer. Monoprice Maker Select, or Wanhao duplicator i3, or Prusa i3 or...
This printer has more clones than Jango Fett! That is, surprisingly, a good thing. The development of this printer came out of the reprap community, and started in 2012, 3 years after I saw the very first mendel, and tought that 3D printing was super cool awesome, but would never be economical due to the price of non-printable parts, like motors and electronics. Welp...thanks china! We now have decent (ish) printers for $300 (on sale, but still)

When it came, I was expecting it to be essentially non-working...or to print like this:

Surprisingly, that's not what happened! Let's start by the beginning though, the opening. Here's the box. Beer for scale (because I didn't have a banana)


The manual, which is pretty much useless when you've been gorging on websites, blogs, subreddits, youtube videos, google groups, etc.

The power supply electronics box. Everything beside the 4 stepper motors, the limit switches, and the heated bed is in there. That's where most of the pixies are dancing. There's a micro-sd (WHY?) slot on the side, along with a micro USB (Which you can't even USE unless you go inside and remove a jumper. What the hell?) There's also a switch-you-must-never-touch to switch the power supply between 110 and 220 volt modes.

The heated bed and the y-axis. Everything is pre-wired....which is both good and bad. Good because wiring in general is a pain, bad because it makes it really hard to get out of the box by yourself. The butterfly on the bed is essentially their QA check I guess. Making the printer run before shipping it, and showing the customer that it did work...at least before being shipped.

But I DID manage to get it out! Ignore the harry potter on the wall, that has been there for way too long, and i'm not supposed to stay much longer, so removing it is way too much effort for what it's worth.

Aaaaand assembled. That was actually really easy!

Then, the other box.

Electronic box cable, a USB cable, micro-sd card, a free complementary scrapper, spool holder, and allen keys. Metric allen keys. At this point I should mention this: EVERYTHING on the printer is metric. Most 3D printers are metric actually. I think it's a good thing, and might actually help americans switch slowly to metric. (Unless they're all using stratasys printers, then we're screwed)

While i'm here, I want to point out some weird design choices. Like, why is this belt pulley fixed only on one end? and with a BOLT? I mean, bolted connections aren't known (or used, EVER) for their strength in flexion. And why did they use a flat cap? had they used a socket cap I could've put a zip tie or something to help, and make the bolt (and zip-tie) force in shear...but nope, stuck with that. I'll need to go buy an M4...or 5, can't really know without taking it off, socket cap screw and zip-tie it.

 Enough whining, I only paid 478$ for it anyways, time for printing!

It works!

 It...oh, wait, it separated from the bed and got stuck to the nozzle...ooh.

I did manage to get something printed though (from the sd card) It's about high! I have a chair! a 3d printed chair for ants!

I don't want to print via SD card forever though. What happens if you try to print from the USB port is...the printer resets. You have to go in, open the electronics board, and remove a jumper. The one nicely labelled "Auto-reset" right above Arden of the Ardentissimo. Another bad point here, EVERYTHING is hot glued. I understand that for transport these days, with courrier services pretty much playing soccer/football/football with parcels, you want to connect things in a way that won't come undone. but i'm disapointed nonetheless. It's a bit overkill...and I will hate it if that board dies. Or if the power supply dies, as chinese ones often do.

Now that I can print from USB, the calibration can commence! I had a hard time to even print since that chair. Nothing would stick to the bed, and leveling didn't help. At that point, I found out my aluminium build plate gets a "nice" dome shape whenever it's heated. Thanks, thermal expansion! (not the minecraft mod) So until I get a glass plate, I can only print in the very center of the bed. Oh well, that will do for a few days. Then, things STILL wouldn't stick. So, I thought the raft looked pretty anemic. At that point, I thought I might not be extruding enough plastic. On to E Step calibration!

A nice calibration guide, for any printer, is this one here: Calibration guide

E-step calibration is pretty much the act of telling your printer's firmware how much steps/mm of filament it takes. For my printer, the default value was 96. What you do to calibrate it is to make a mark on your filament, 110 mm from the top of the extruder, then tell the printer, through a program that can send gcode like pronterface, to extrude exactly 100mm of plastic. the ratio of 100mm over what actually came out is the value by which you should multipliate your estep.

And that worked! got a 3D benchy to print. It's measurements are...okay. 32.1 wide, 59.85 long, and 49 high, instead of 32, 60, and 48. The 49 is what annoys me the most, the others are...pretty much spot on (for an out of the box printer) 150 off microns isn't bad when you think the best FDM printers claim 50 microns.

 Then I printed one of MAKE's 3d printer shoot out test models, the dimmensional accuracy one to be exact. My x and y are pretty spot on. You see a the top a small problem though! That is due to 2 things: poor cooling, and me not putting back the extruder setting to 200 degrees after messing around with it, before calibrating my e-steps. So the PLA might have been extruding at 225 degrees.

Because of those cooling problems, (which you can also see in the door's overhang on the benchy) I decided to print a cooler! the diii cooler. I'm doing longer and longer prints! That one took 7 hours.

Printing the diii cooler was a mistake though. I should've printed the cobra... the diii cooler has REALLY low visibility at the beginning of a print, and strings like to stick to it. oh well, I wasted what? 28 grams of plastic out of a kg spool. not too bad.

My next print took WAY longer. The diii cooler needed an adapter to use the stock 30mm fan, and, well, I wanted to get on reddit's 3d printer bandwagon and print The Pink Panther Woman. I won't share a picture, because it's not safe for work I guess.

The next print, which was going to be going for 23 hours, screwed up like this:
 I have no idea what happened. I stopped it and spent a few hours leveling the bed again. But then I noticed I could never get it level! I always had 1 corner that would be way too low, or way too high, and whenever I fixed it, the other corners would screw up. and another would become too high...the cause? my y axis slide-shafts aren't co-planar. Something to fix in the future. For now, I can print well on 3/4th of my bed. I'll finish printing a few mods, and then get down under the printer and fix it.

I've also started 3D printing rocket parts!


And obviously, parts for the printer itself!


I still have a few upgrades i'm planning on doing: Making an enclosure to print ABS, and switching the hot end for a micro-swiss all metal one. Also changing the print cooling fan since the first one crapped the bed. I'm also having a few under-extrusion trouble since a print failed catastrophically (but I don't have pictures, I was more panicking on cleaning the printer and making sure nothing exploded). While frenetically tring to fix it, I noticed the extruder stepper were getting a bit hotter than I like. I'll check the voltage reference, as a common problem on this printer is that it's set too high for the stepper, causing overheating and skipped steps.

End of the semester

I'm actually taking a break from studying for my last exam EVER (well, beside the order's ethics exam in 3 years or so). I still have one semester to go in my bachelor, but the 2 subjects I have left are my capstone design class, and a fluid lab both of which are reports-based. I've also found an internship for this summer, which is required in my program. I was getting worried I would be only missing that to graduate.

So i'm pretty much guaranteed to graduate for christmas! yay!

Monday, April 4, 2016

3D printing, molding and casting!

A few weeks ago (as of posting this, not writting) I received an e-mail from my student project director saying the Department of Electrical and Computer Engineering were planning on buying a few 3D printers, and wanted our opinion on the matter. They had received many sponsorship request to buy 3D printers, and, due to the demand, wanted to make one/some available to the whole Science and Engineering Faculty. They also had made a pre-selection of printers: The Form 2, which would be primarily used for research purposes, and a Stratasys uPrint SE.

The Forms 2 is a GREAT idea! it's not too expensive for research, it's high quality, and it's..."fairly" simple to use.

The uPrint SE...well...it came out in 2010. Just to compare; you know what else came out in 2010? The first Ultimaker. Oh, and the very FIRST Makerbot came out in 2009. Thingiverse started in 2008. Heck, the reprap project started in 2005! The uPrint SE is closer in time to the creation of the RepRap project than today! It's minimum layer height is 0.254 mm (oh, look at that, 10 thou, not even metric), a far cry of today's 0.1 and 0.2mm, (or even 0.02 if you actually believe ultimaker's specs) Not only that, but it costs 17 000$ canadian pesos. Well, ok, 12 000 for the printer, some for the wavewash...thing, and some for taxes, duties, formation, and so on. Still, for a printer not really better than the Printrbot simple, it's quite appalling.

So, I've tried to steer the department away from that printer, towards cheaper alternatives; Rostock max v2, Ultimaker, Makerbot, Printrbot simple, Lulzbot Taz5, Markforged, etc. For that 17 000$, you could almost buy all of them! It would serve the community better, and allow for unhindered growth instead of being stuck with 1 big and expensive printer for a while, until the next grant comes in...maybe. The main problem being that you also have to include time for set-up, calibration, and maintenance. On that point, the uPrint should be more more or less "Set and forget" While, for some other printers, the process can be...a lot more complicated. Finding the right tool-chain: Cura by itself? Cura + Pronterface? Slic3r? and so on. Then finding the right settings for every printers, then printing, maybe, and finally, well, maintenance is another thing you have to consider when you have to pay technicians to maintain these things.

All right, enough text, let's go to more interesting stuff!

Now...tax return season has passed, and I have some money to do stuff...humm, what can I do...humm, looking at all these 3d printers for actual research makes me mighty tempted. Uh? Monoprice has a printer? Uh? the old version is on sale and has better steppers than the new one? Oh? it's based on one of the newer reprap (The last I had heard of reprap before that, the Mendel just came out...2009) What's that? only $300?...welp, looks like I now have a 3d printer! (which, after a few mods, will still be better than that uPrint SE...) Delivery is expected this week! I already got the plasteeq too!


The next post will be an adventure in 3d printer calibration.

Mold Making and casting
Since I didn't buy the HTC Vive (because I think it would be worth 1000$, not the 1400 canadian pesos they're asking for right now) I finally bought all the smooth-on products required to do a mold of that part on dark repulsor that makes the whole build so hard.


ALL the smooth-on products, +Punished Props  would be proud

I've been watching Bill's (+Punished Props ) videos forever now. So I used what I learned to do a one part mold. Measuring cups are so usefull! And since they're flexible, if you mix your stuff well, you can just pull it off once it's cured.


I ran into a small problem casting the mold. I used contact cement to hold down my master on the floor. Thing is, contact cement is somewhat flexible...and the silicone got under the master and lift it up. I'll have to sand the bottom of both my finished pieces. Oh well, now I know not to use contact cement to glue down a master, and to be careful so the bottom of the master is somewhat water-tight.

Guesstimating the correct quantity of...well, everything, is so hard! I made double the urethane I needed. Oops =( Should've filled the mold with water first to see how much i'd need.


In any case! I got 2 pieces I can use out of it! I've wasted some material, and i'll have to do some sanding so the pieces sit flat, but for a first time, i'd say it's pretty good. I've failed at some thing, but then, success is built upon failure! As long as you learn from those failure!

I know I'm getting late on the Robot Combat rule translation. The construction specs are taking a longer time than planned to translate as they are way more technical than everything else. I've also missed a nice opportunity with the Montreal's Festival de Robotique being the past weekend. Oh well, it's coming soon (tm)


Saturday, March 5, 2016

Spring break week! Old electronic equipment salvaging.


Midterms are (semi) over! Springbreak is here! What best way to start spring break than by doing some electronics salvaging!

Cleaning up the basement, I realized I had an old all-in-one printer, and an old scanner, taking wayyyyy too much space. Instead of just throwing them out, or giving them away, I decided to salvage them for parts. I knew I would end up with a few DC motors (enough to make a battle robot maybe?) and a few precision-ground shafts.

This is going to be a looooong, image heavy post of me disassembling both.

Printer

Starting with the printer. It's an HP Photosmart C-3180 all in one printer.


Each sides have 2 screws, and are easily removable. No clips! What kind of madness is this? I was expecting clips everywhere! From this side I already see one of the shafts.


And gears!

Two screws on the case-side of the cover holds the whole top. This time there are tabs on the front, but just gently sliding the cover up and forward makes it pop off.
Under it, we find the top control panel, and the clear glass. The glass is held by 2 tabs on the right corners, and 1 piece of plastic screwed in the top, holding the left side.

Here's a better view of the piece of plastic holding the glass, along with the LCD and control panel on the left.

With the top gone, we now have the digitizing head exposed. Humm, why is the ribbon going to the motor so big? what is going on?

Wait...is that...yes! that motor has relative-position feedback!...or maybe speed? In any case, i'm pretty sure both can be done with this encoding wheel.


Going deeper, removing those two screws let you remove the whole top where the scanner thing would slide on.


And we're in like Flynn! From here we can see the cartridges, along with their controller.


This thing is what controls the jet of ink. It also has positional feedback thanks to a ruler with very fine lines printed on it. A photodiode shines light through that ruler, and a photo receptor then send a signal every time a black bar flies by. And I do mean FLY by. The lines are barely visible to the naked eye, and the print head is moving awfully fast! If you want to know more, go here.


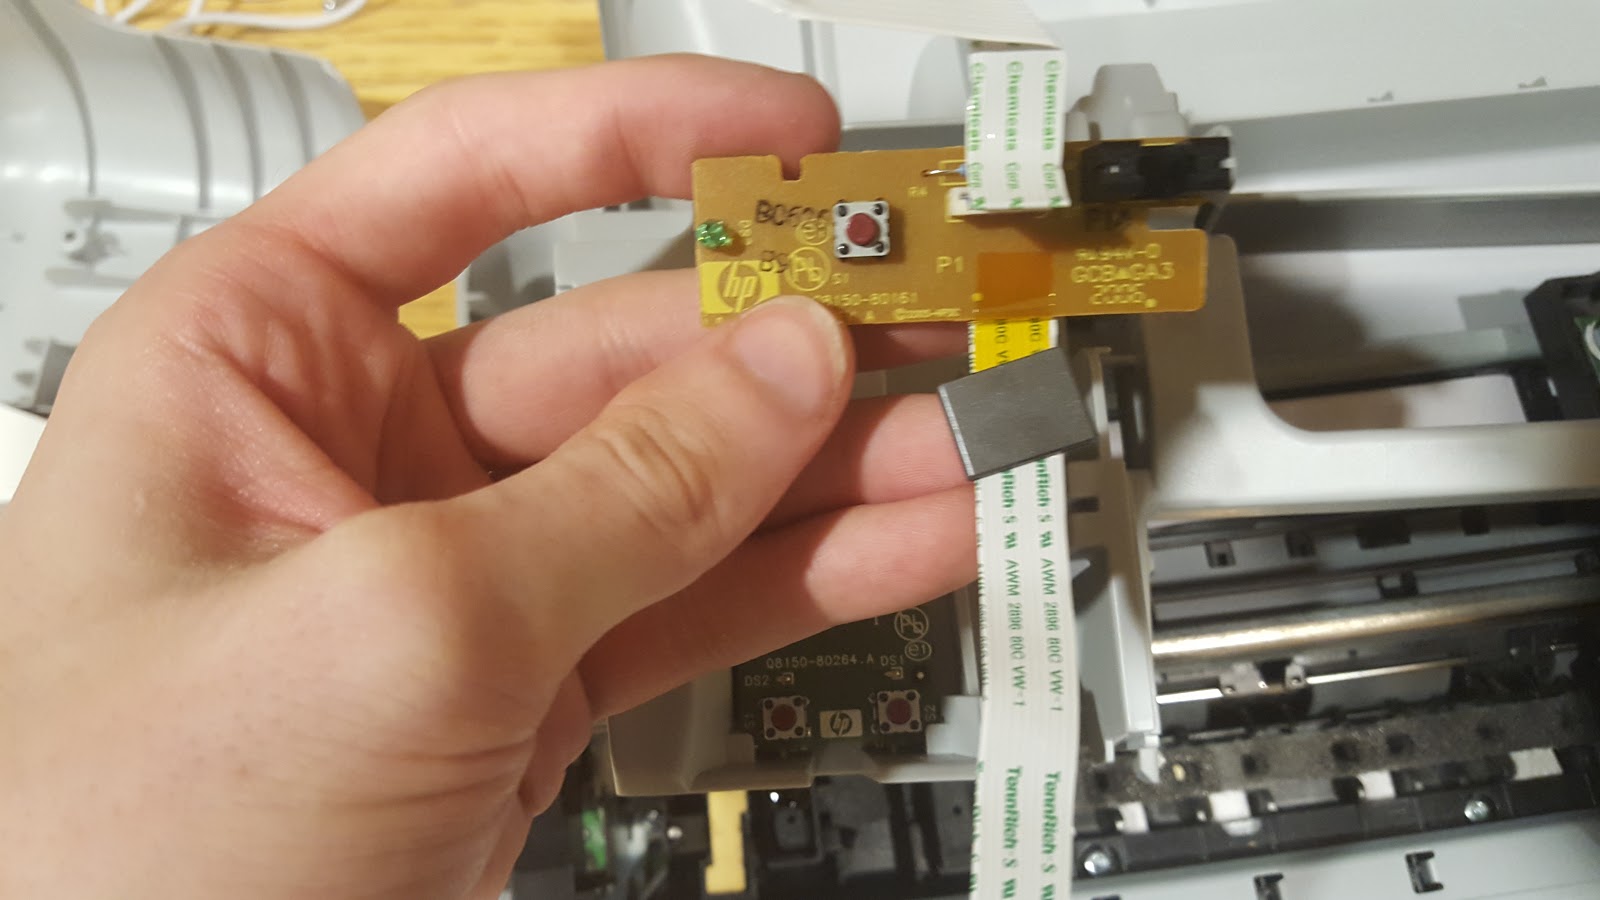
The power button! So cute! And a ferrite bead just for it? wow.


Here you can see one of the 3 precision-ground rod used in the printer. This is the one the printhead slide on! It's held in place on both side with a circlip, and on this side, it's also attached to a spring. Is it for positional accuracy (so that the rod would always come back toward the back side) even though the sheet metal work can't be too accurate, or is it a structural vibration thing? no way to say easilly...and i'm too lazy to actually put everything back together test it with the spring on, remove everything, remove the spring, and try to see if there's a difference to the print quality (or vibration, but I don't really have the tools to test for that)


Once the circlip is removed, the rod slides out easilly.


A few pictures of the printhead. I couldn't find a way to remove the pcb from the plastic casing...so all in the trash it goes!


Some more sheet metal removed. We see 2 more rods, and 2 motors! Nice!


I must admit, the way this rod attached to the sheet metal was...weird. I broke the plastic to remove it, but it sure felt there was a correct way to remove it...


Part of the gear train that is used to take pages from the tray, and push them around in the printer.


Most of those gears are press-fit. What really surprised me was that the rods have small gear-like tooth cut into them. Apparently, the plastic gear is molded with the hole being a bit undersized for those tooth, and the press fit operation actually force them in the plastic, forcing them to be solidly attached in rotation.


From this point on, I don't really know what I was doing. I was simply trying to get to that last rod.


Final loot. Many push-buttons, 3 DC brushed motors, 4 precision-ground rods, 4 springs, a few gears I probably won't use, and 1 pane of glass.


All in all, that was quite fun to disassemble. It's always interesting to see just how much engineering goes into even a cheap printer. All the molding, the sheet-metal work, and the easy of assembly (or disassembly). Now, hopefully one of those motors have the same specs as one of my other ones so I can build something with two wheels...

Scanner


Removed the 4 screws. The doesn't want to pop-off...humm...oh noes


Clips, clips ALL around the border. This isn't gonna be easy. humm, why is it only that black border that came off? why is everything still in one piece?


MOAR clips! Sorry for the blurry picture. The top was ALSO held with clips. Pretty much everything is held with clips.


The glass pane is actually double-sided-taped on


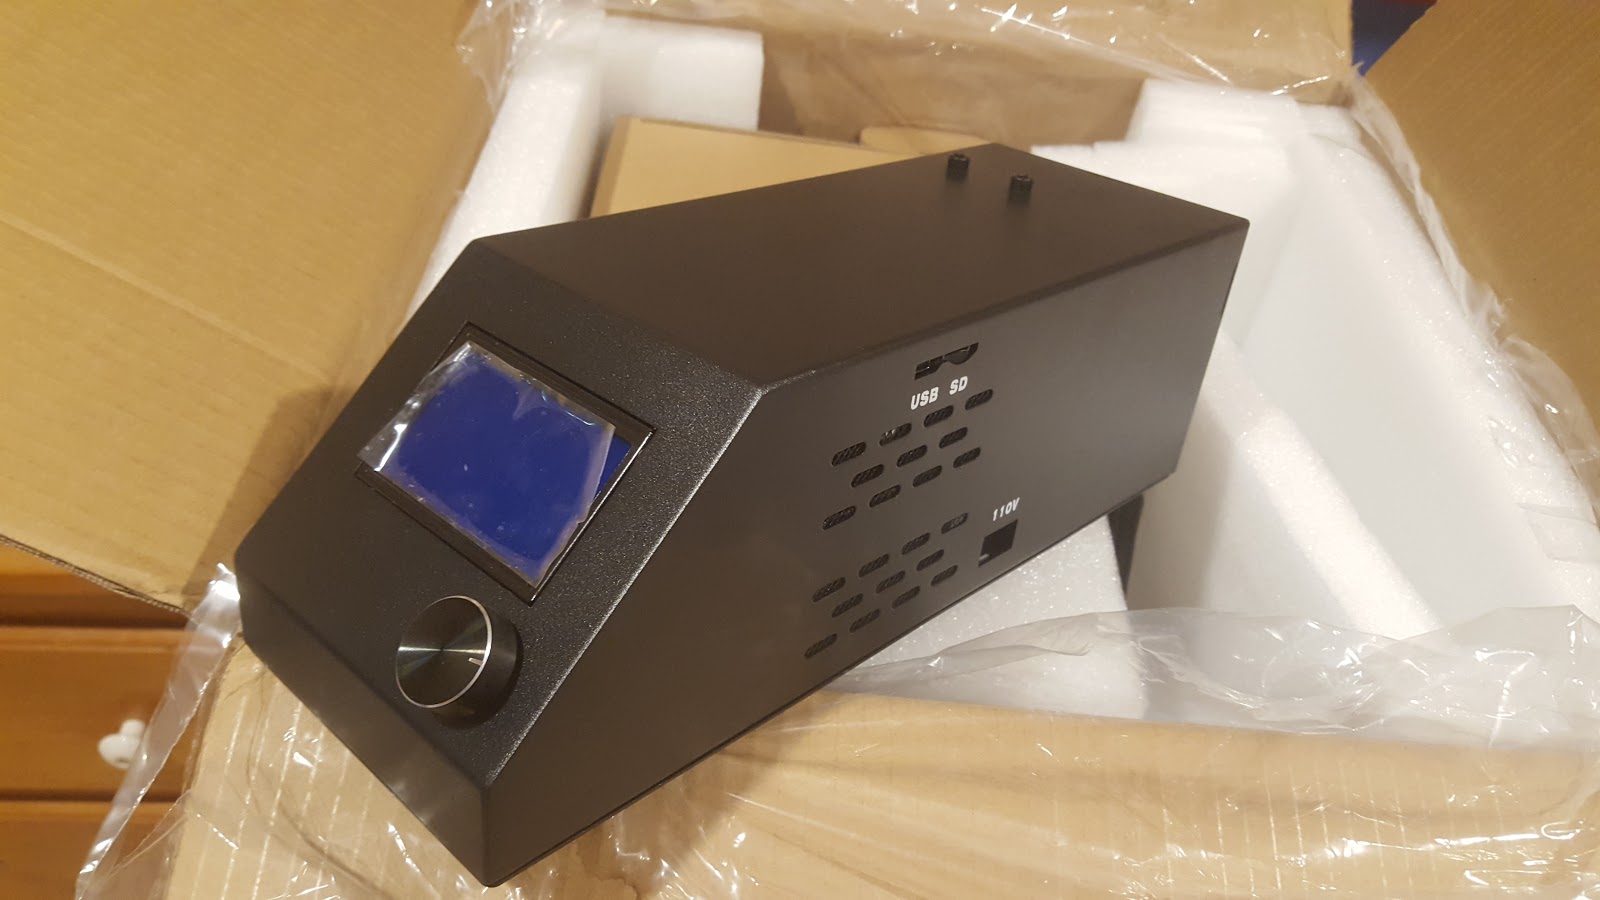
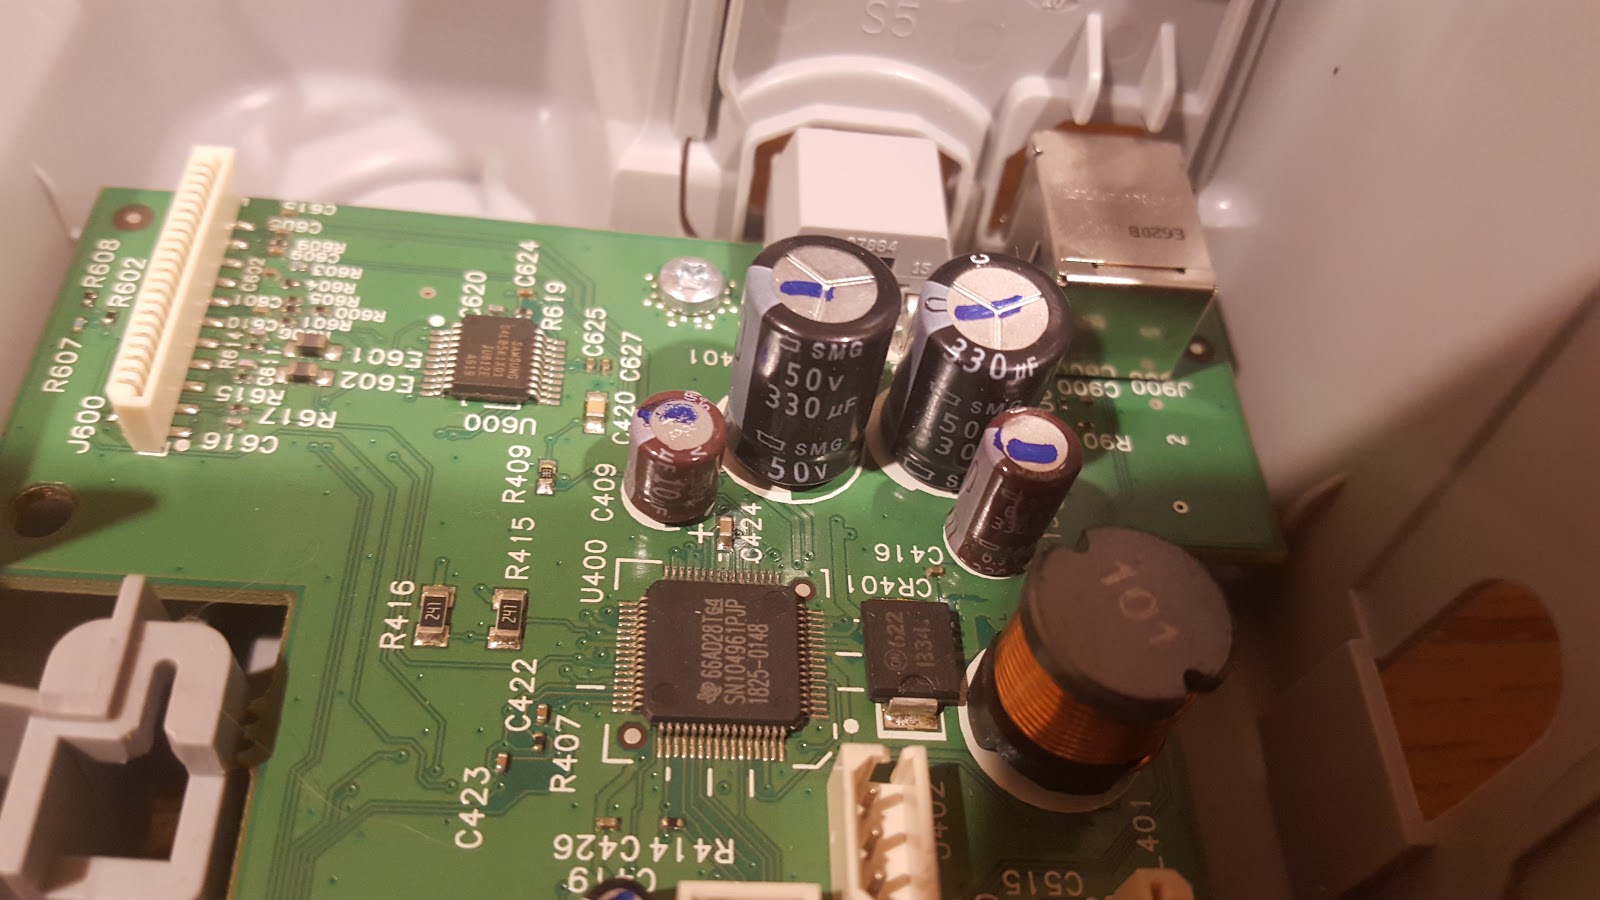
The electronic board for whoever's interested in those kind of things. I'm not qualified to say anything about it.


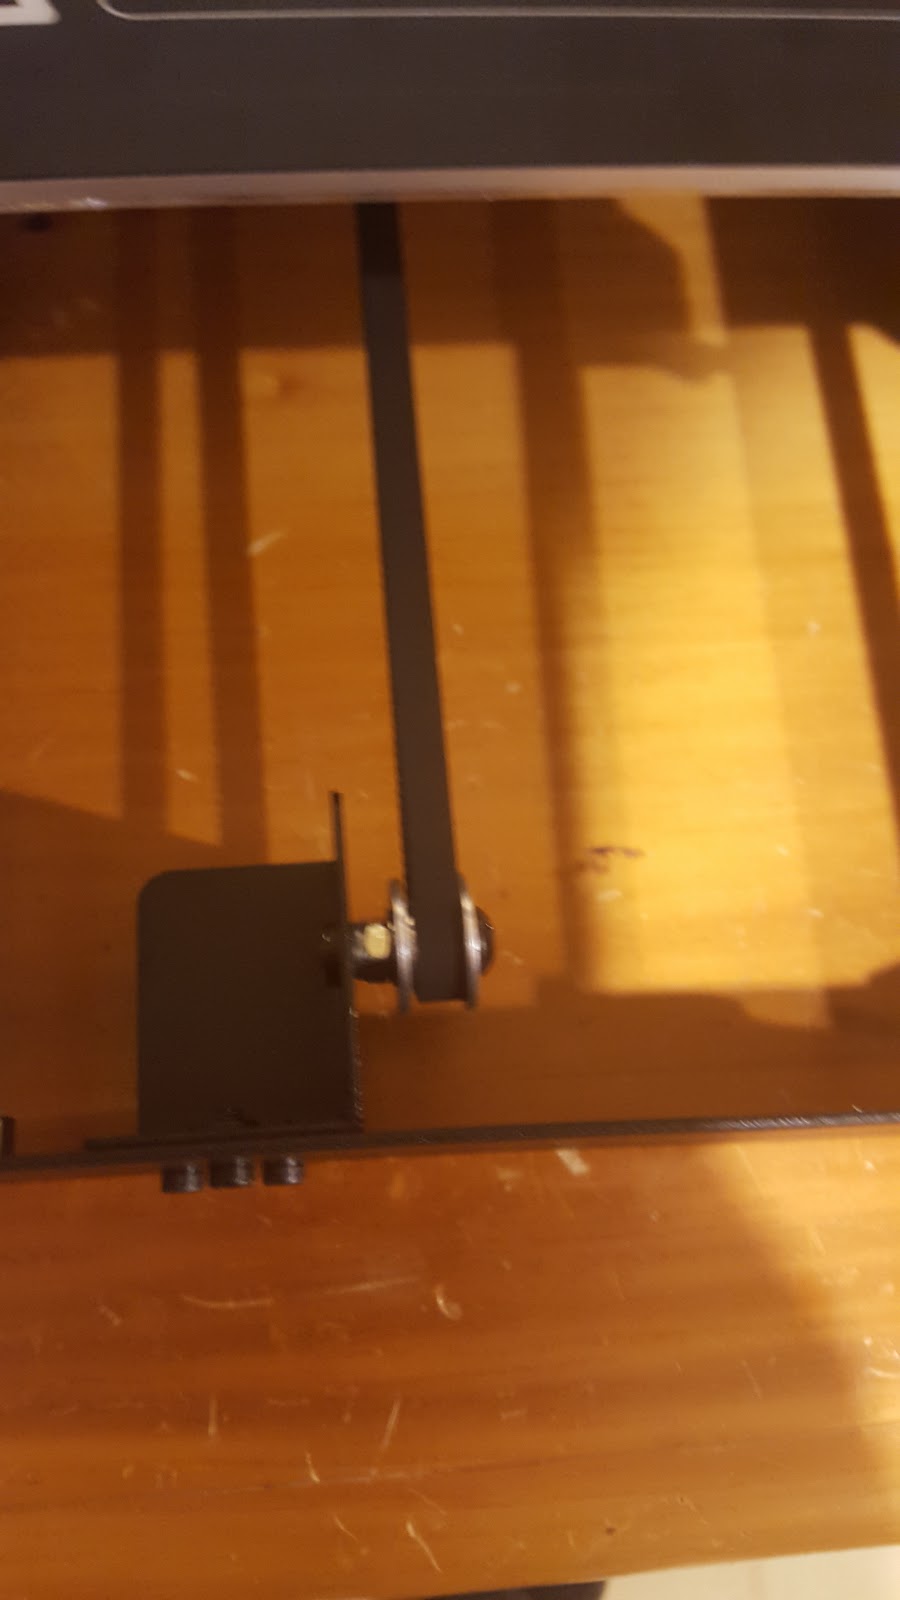
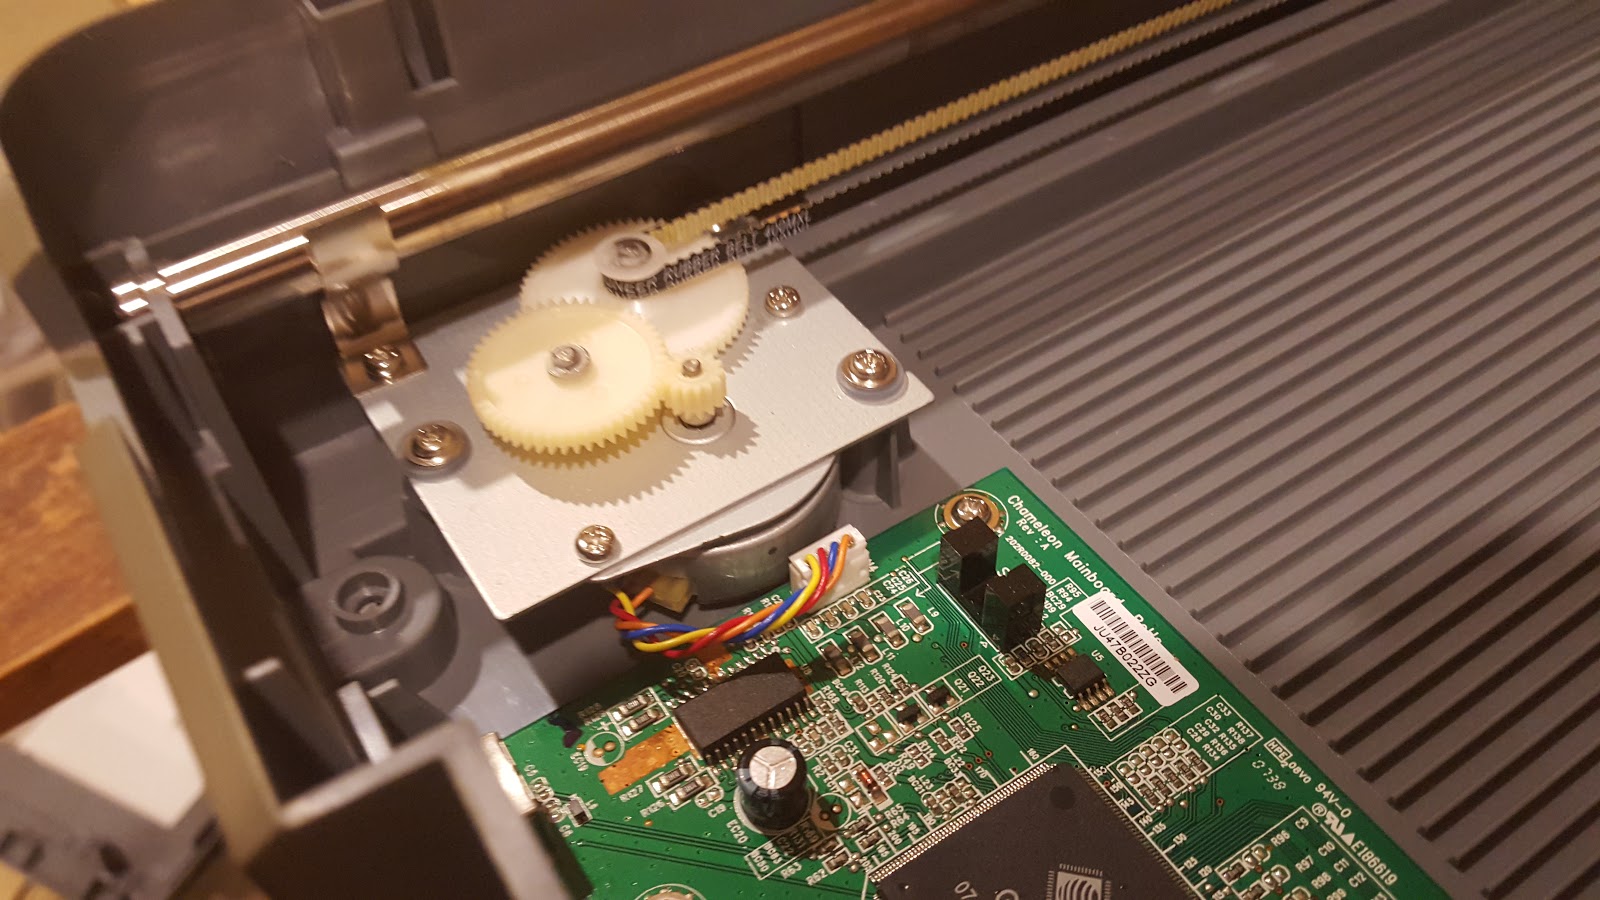
Well, that SURE looks like a 3d-printer drive...


No circlip here. The injection-molded shell has a clip for the shaft.


Looong shaft.


The belt is tensionned used a spring. Quite ingenious. i'm surprised I haven't seen that in any belt-driven 3d printers...but then I haven't seen that many of those either so meh.


I guess that's the CCD control board...


It says caution everywhere...halogen lights drivers?


The lens.


Yep, it was the CCD control board. The money shot! That's my first time seeing a "naked" CCD.


Allright, enough electronics, people will wonder why i'm in mechanical engineering again...let's look at the motor. Wait, does it has 4 wires going to it?


Yes, yes it does...humm, that....that is not a DC motor. Can't find a Datasheet, but according to alibaba, that's a 2 phase stepper motor. I have no idea what it's resolution is, but i'll be testing it later. Using this, they didn't need to use a linear encoder like the printer did.


Loot from the scanner. I'm keeping the CCD because...well, i'm sure i'm not the only one who's never seen one. The motor and the shaft will be useful, the rest i'm keeping mostly as curiosities.


Update on my Goals for this year:


I've been bad. With midterms coming, I focused on that, and set the goals aside. Had I tried a bit harder, I could've fit everything in. 

I was starting to hit a wall with the guitar, where I could play each song up to a certain level...but then any harder and everything comes crashing down. I think I need to review that a bit, maybe start trying to learn specific songs using tabs, instead of rocksmith, and play them in slow motion, and then faster and faster.

As for the Ocarina...well, everyone around me apparently hates the sound of it. So I stopped doing that too, as I was getting yelled at. I'll start again when I can play outside I guess...which means not right now, because I don't enjoy frostbites.

As for math, until my midterms, I've had problem finding exercise sets.

During spring break I got a sudden windfall of money, in the form of the vive being WAY too expensive for me with the current Canadian dollar. As such, I ordered some silicone and urethane resin to finally finish Dark Repulsor. This should be coming in the next week.

Finally, I read a book! One that wasn't related to engineering! It had been such a long time, I had kind of forgot what it even felt like, how you could get sucked into it. The book I read was "An Astronaut's Guide To Life On Earth" by Chris Hadfield. Now, i'm tremendously bad with names, I can barely remember the name of some people I interact with every week! Mr. Hadfield is one of the people, along with Adam Savage, Phil Plait, Elon Musk, Carl Sagan, Neil de Grasse Tyson, Bill Doran, Gabe Newell, Bill Nye, Charles Guan, and Stephen Colbert, whose names I remember easily, because I look up to them. So, it was that much easier for me to read the book.

What I took from the book was this: Humility is one of the most important thing. Be a knowledge sponge. Aim to be a zero, that is, to not be seen as a drag ( a minus one) nor as a know it all, above everyone.

Those, without ever having being said that way, have always been my goal as a human in engineering. Coming from a family with many technicians, all I ever heard about engineers was "Stupid engineer did X again, we told him it was a dumb idea" "We all know, they never listen to us technicians" "Stupid engineer, always so full of themselves, always making themselves to be more important, to appear more intelligent, more X than us". I don't think that is healthy, in any organization.


That is it for this post. Spring break is coming to an end (notice how I said it just started in the first paragraph...). This is probably going to be my worst post ever, as I just want to get it through the door...in a timely manner, and not in June. Next up! Rocket Building (maybe), French robot battle rules posting! Working on my first mold! And other unforeseen stuff.