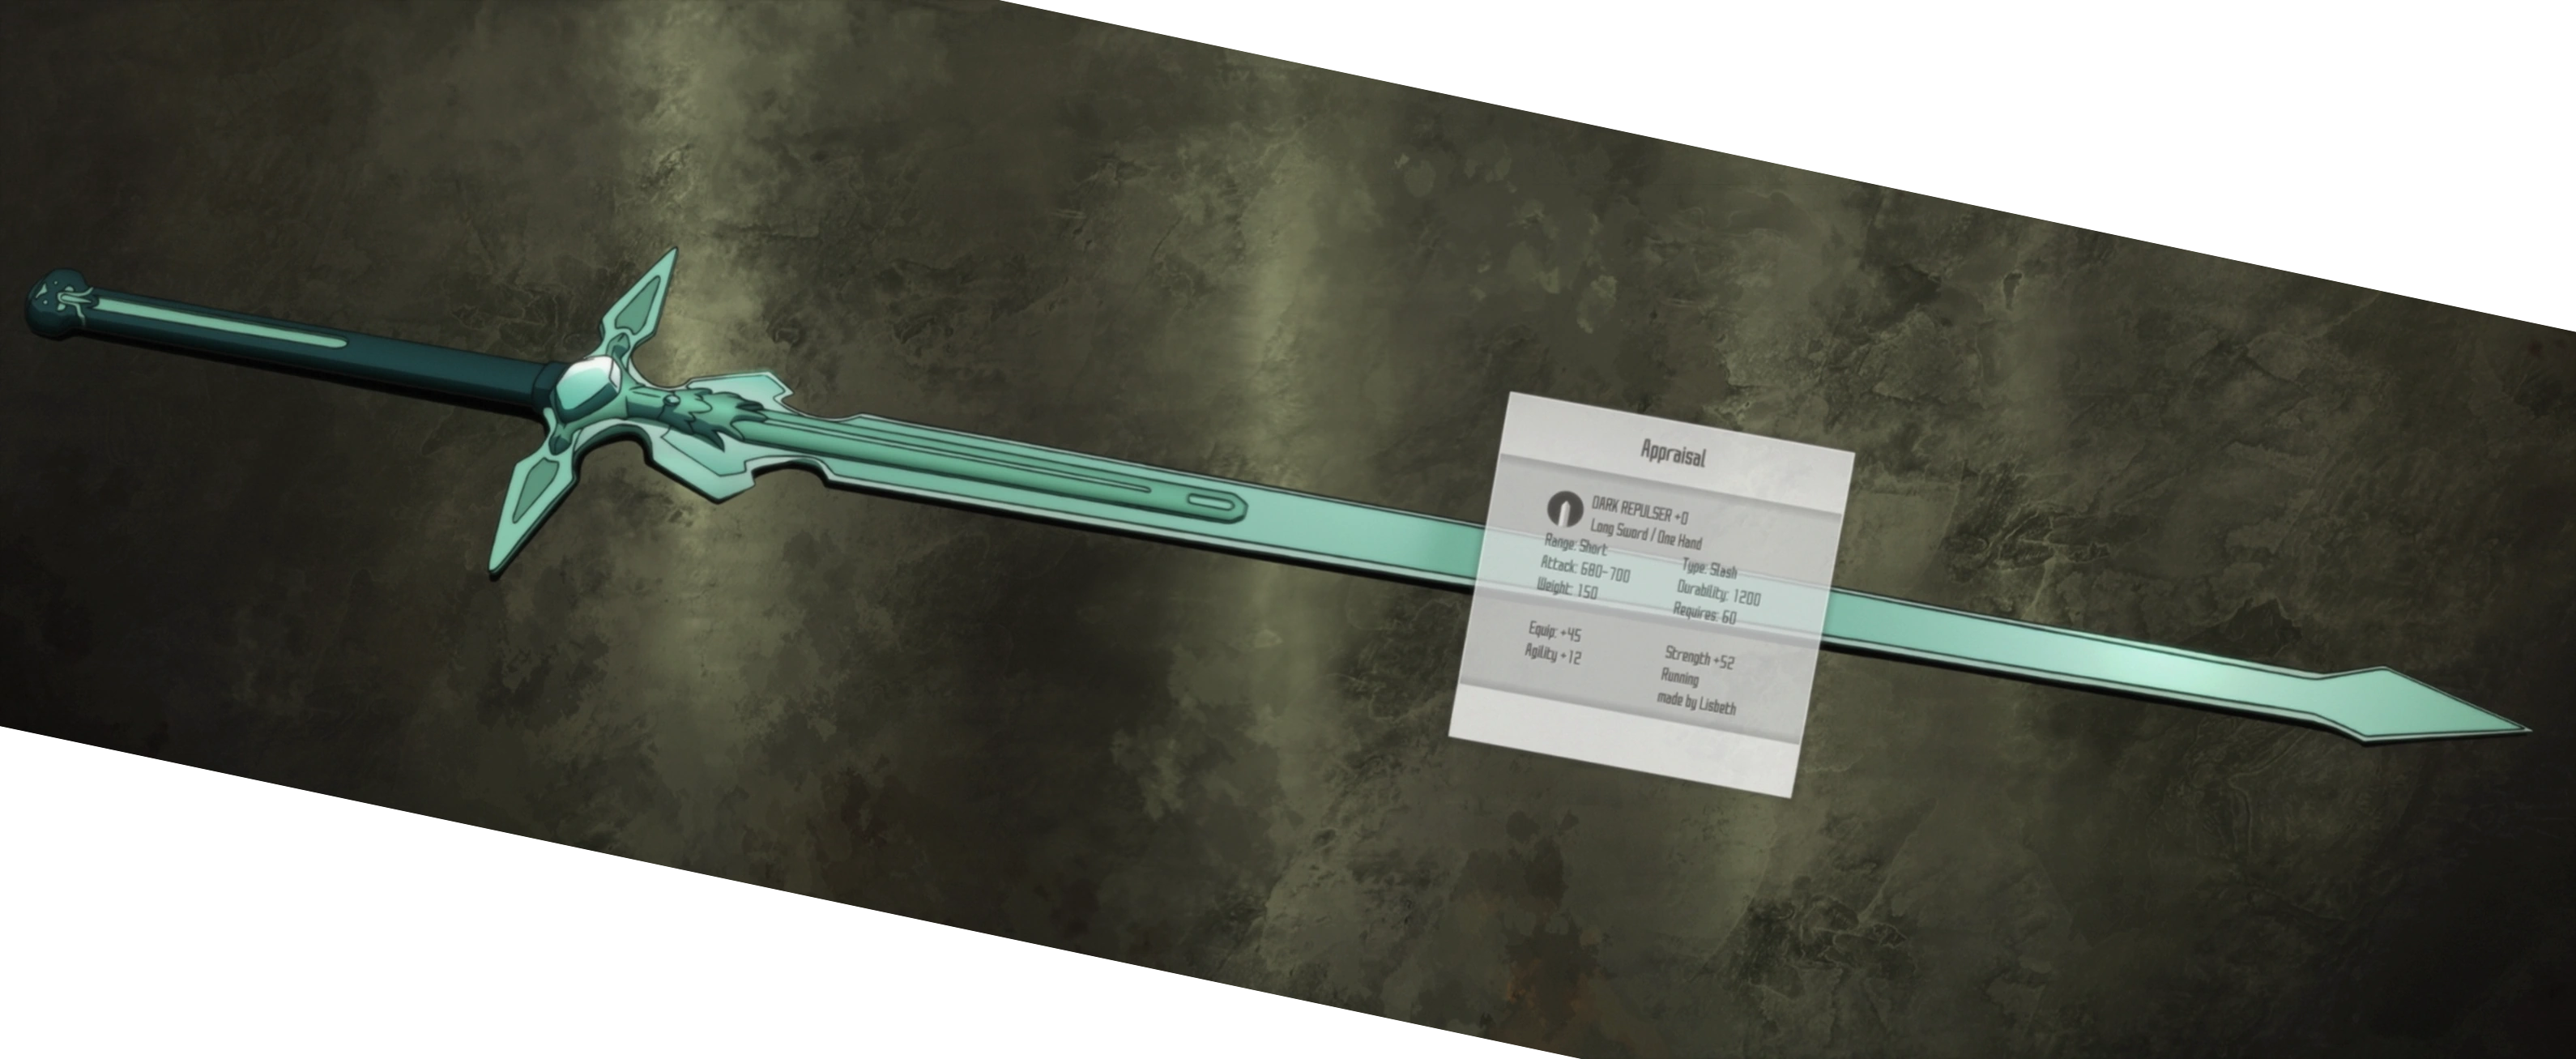
It's been a while I didn't post here, so here's some catching up.
I'm done with university. I only had one semester left to do, with two classes. One was a laboratory class, where, with a team of 3 other people, we had to calculate the efficiency of a shell and tube heat exchanger for it's whole range of operation. The other was a capstone design class where we designed, but not built, a diesel portable power unit.
The lab class was...fun. One of our teammates kept writing weird things...like..."Heat is the measure of the sensation of hot and cold"...wow? Anyway! The set-up looked like this:
The tube and shell heat exchanger is on the left. At the bottom of the exchanger there's a set of valves that permit the exchanger to be operated in either parallel or counter-flow configuration. On the right there's a water cooler along with it's tank, and behind the exchanger there's a water heater, also with it's tank. Temperature could be taken at 3 points in the head exchanger, using thermistances.
The capstone class...well, it took time. And while I didn't enjoy the subject too much, I really loved working with that team. One of the things I've worked on was a 3D-printed control panel.
The 3D printed control panel printing.
Now that school is out, I can re-start doing other projects! The first order of business is cosplay. There's a sword I've been working on for years (!) that I need to finish. I was scared of doing the detail on the handle and pommel, but with Nadeshicon coming soon, and me wanting to have a life and go out at cons...and not wanting to learn to sew yet...well, I guess I did it.
I had tried to carve out the details at first, but it didn't look right...so instead, I took a page out of Bill Doran's book (well...not his actual book...but still...) and made the details out of craft foam!
That makes the 4th material/fabrication method used in this sword. It has literally become a capstone prop making piece. There's wood carving, resin casting, 3d printing, and foam fabrication.
It was also my first time using my new dual-action, gravity fed airbrush and mixing my own paint. I'm really happy with the result too!
And finished! Here it is next to it's sister.
I've been neglecting wirting this post for the longest time, and the longer I waited, the more things I did that needed to be written. So i'm posting this one, and i'll try to write more often. I already have a few projects for which I have pictures that are done or almost done:
An old camera from a fighter jet that I disassembled
Ironwood's gun from RWBY
A cast of my own torso!
And I have way more projects that are in the work! So stay tuned!
I'm not dead. I just haven't had any share-able projects so far, nor did I do much work on my project backlog. I did advance some things here and there, but work and school is killing me taking all my time at the moment.
Here's what I can share!
They're cleaning the warehouse at work, and I got to go home with a few interesting items. Some I will disassemble at some point...but first here's a box:
If only I could rotate pictures...
That I refinished.
Much nicer. According to the black tag, it used to be used for a Collimator that was probably used to check for planarity of big surfaces.
Not shown on the picture, but the box was all mangled. The tape was literally holding it together! As soon as I removed all of it, the bottom and the back fell right off. The front was fine though, so there was no need to tow the box outside of the environment. Nothing epoxy can't fix.
I also tried my hand at sewing for making a parachute for the rocket club at university.
This...stitch? Folding method? Thing? Is based on AC43.13, the FAA advisory circular for aircraft repair. The start of it is pretty ugly, but it holds together quite well. This is a great experience that will elevate my cosplay making skills to new levels!...that is, level one hopefully...because I haven't finished a single cosplay yet...
Speaking of cosplay, I finally grew a pair and added the molded and 3dprinted pieces to Dark Repulsor...now I only need to add details to the handle...and paint it. Haven't taken pictures though...I really need to get better about that.
One of the hardest parts of any project is finding just where to get the pieces you need. Americans have it easy thanks to McMaster Carr, which, if you're lucky, will offer same day delivery (looking at you Charles <.<) or Amazon Industrial. None of those ship to Canada....except to existing customers in the case of McMaster.
So, how do Canadians get supplies to make...well, anything? It depends what you need, and how quickly you need it.
Most of the sources are included in the materials sources on my side-bar, but I thought it would be a good idea to make an actual post about it. I'm not paid to write about any of this. If you have other sources, feel free to leave them in the comments!
I'm in no Hurry and I don't REALLY care about quality
Ebay and various direct-from-china websites have everything you need, including a jet engine or two, probably. Thing is, you're pretty much guaranteed to wait at least a month for it (even if the ebay estimated delivery says in 2 weeks, it lies), and then 1 or 2 out of every 3 items might not work, or work a very short time, or get to you broken. I used to also buy from Aliexpress, but they don't accept paypal anymore... and i'm not ready to give my creditcard number to china just yet.
I want quality stuff/I need it in less than a month
If you want electronic parts, the regular American sites do ship to canada. Sparkfun, Adafruit, and Pololu are all very good sources...Adafruit and Pololu in particular since they have tutorials. Not only that, but the usual, more engineering-oriented sites work too. Digikey has a canadian website (Digikey.ca), and element 14/Newark ships to canada.
For electronics, Canada has a few shops of it's own too. Robotshop and SpikenzieLabs, for instance, are both based in the Montreal area.
If you need anything related to RC, motors, batteries, and such, Hobbyking's where you'll want to go. Their parts have been used in everything, from silly go karts, to Battlebots, to powering, and then blowing up with, MIT's rocket (not the batteries fault. after 4 tries you'd think they'd find out how to do a proper recovery...) I know some people wouldn't consider Hobbyking to be quality, but it's really the middle ground between very expensive quality and cheap piece of crap.
If you want mechanical parts...well, good luck. Misumi USA does ship to canada (along with being VERY expensive. 67$ for a 250mm long 8mm leadscrew with 2 starts? i'll buy 4 from china and hope one is actually straight and made of metal, and only pay 30$ TYVM) and when you really need it it's there. Surplus Center ships to canada, and also kind of have a Canadian equivalent called Princess Auto. Fastenal is there for all your fasteners needs and is getting more and more products trying to compete for the hole McMaster left in the canadian sources, as is Ackland-Grainger.
Also, amazon.ca has some stuff.
I don't need no electronics or tools, I need raw materials!
Getting raw materials in canada is so hard, unless you're a company, or willing to pay (and have the space to store) 1000$ worth of steel or aluminium at once, no metal selling companies will want to talk to you. Some machine shops do sell in small quantity, but in my experience they tend to see you as a nuisance more than anything else.
Enter Online Metals. Want 0.5" titanium plate? You got it! Need C385 brass flat bars? got that too! Tool Steel? of course! 1100 Aluminium? Unless you want to make something out of actual Inconel, they'll have everything you need. While they have aluminium, I wouldn't recommend using them for aluminium. Instead, go to Aircraft Spruce. Because they are canadian, they don't have the antidumping tax american companies (like online metals) might get hit with. They are also a good source of carbon fiber, glass fiber, and epoxy. Both also sell plastics.
If you don't need wide sheets of metal, Sidecuts might be a cheap source too.
I want cosplay/Artsy stuff
Canada has a good source of cosplay supplies, although I can only really mention the ones I've used.
Sculpture Supplies is my source of Smooth-On products, but they have everything related to sculpture; tools, materials, Worbla. But finding something on their website can be hard sometimes if you don't know the exact name of the product you're looking for.
If you want EVA foam, there's only one place that sells REALLY great EVA foam. TNT cosplay! (they also have Rytlock Brimstone on their main page, so why WOULDN'T you want to buy from them?)
A few weeks ago (as of posting this, not writting) I received an e-mail from my student project director saying the Department of Electrical and Computer Engineering were planning on buying a few 3D printers, and wanted our opinion on the matter. They had received many sponsorship request to buy 3D printers, and, due to the demand, wanted to make one/some available to the whole Science and Engineering Faculty. They also had made a pre-selection of printers: The Form 2, which would be primarily used for research purposes, and a Stratasys uPrint SE.
The Forms 2 is a GREAT idea! it's not too expensive for research, it's high quality, and it's..."fairly" simple to use.
The uPrint SE...well...it came out in 2010. Just to compare; you know what else came out in 2010? The first Ultimaker. Oh, and the very FIRST Makerbot came out in 2009. Thingiverse started in 2008. Heck, the reprap project started in 2005! The uPrint SE is closer in time to the creation of the RepRap project than today! It's minimum layer height is 0.254 mm (oh, look at that, 10 thou, not even metric), a far cry of today's 0.1 and 0.2mm, (or even 0.02 if you actually believe ultimaker's specs) Not only that, but it costs 17 000$ canadian pesos. Well, ok, 12 000 for the printer, some for the wavewash...thing, and some for taxes, duties, formation, and so on. Still, for a printer not really better than the Printrbot simple, it's quite appalling.
So, I've tried to steer the department away from that printer, towards cheaper alternatives; Rostock max v2, Ultimaker, Makerbot, Printrbot simple, Lulzbot Taz5, Markforged, etc. For that 17 000$, you could almost buy all of them! It would serve the community better, and allow for unhindered growth instead of being stuck with 1 big and expensive printer for a while, until the next grant comes in...maybe. The main problem being that you also have to include time for set-up, calibration, and maintenance. On that point, the uPrint should be more more or less "Set and forget" While, for some other printers, the process can be...a lot more complicated. Finding the right tool-chain: Cura by itself? Cura + Pronterface? Slic3r? and so on. Then finding the right settings for every printers, then printing, maybe, and finally, well, maintenance is another thing you have to consider when you have to pay technicians to maintain these things.
All right, enough text, let's go to more interesting stuff!
Now...tax return season has passed, and I have some money to do stuff...humm, what can I do...humm, looking at all these 3d printers for actual research makes me mighty tempted. Uh? Monoprice has a printer? Uh? the old version is on sale and has better steppers than the new one? Oh? it's based on one of the newer reprap (The last I had heard of reprap before that, the Mendel just came out...2009) What's that? only $300?...welp, looks like I now have a 3d printer! (which, after a few mods, will still be better than that uPrint SE...) Delivery is expected this week! I already got the plasteeq too!
The next post will be an adventure in 3d printer calibration.
Mold Making and casting
Since I didn't buy the HTC Vive (because I think it would be worth 1000$, not the 1400 canadian pesos they're asking for right now) I finally bought all the smooth-on products required to do a mold of that part on dark repulsor that makes the whole build so hard.
I've been watching Bill's (+Punished Props ) videos forever now. So I used what I learned to do a one part mold. Measuring cups are so usefull! And since they're flexible, if you mix your stuff well, you can just pull it off once it's cured.
I ran into a small problem casting the mold. I used contact cement to hold down my master on the floor. Thing is, contact cement is somewhat flexible...and the silicone got under the master and lift it up. I'll have to sand the bottom of both my finished pieces. Oh well, now I know not to use contact cement to glue down a master, and to be careful so the bottom of the master is somewhat water-tight.
Guesstimating the correct quantity of...well, everything, is so hard! I made double the urethane I needed. Oops =( Should've filled the mold with water first to see how much i'd need.
In any case! I got 2 pieces I can use out of it! I've wasted some material, and i'll have to do some sanding so the pieces sit flat, but for a first time, i'd say it's pretty good. I've failed at some thing, but then, success is built upon failure! As long as you learn from those failure!
I know I'm getting late on the Robot Combat rule translation. The construction specs are taking a longer time than planned to translate as they are way more technical than everything else. I've also missed a nice opportunity with the Montreal's Festival de Robotique being the past weekend. Oh well, it's coming soon (tm)
One of the things that annoyed me when I was working as a FIRST team manager was how, whenever I mentionned robots and competition together, people would always, ALWAYS, say "Oh, you mean robot fighting, like Robot Wars?" (Except they're saying it in french). Now, unlike the USA, and Saskatoon, we don't have fancy pansy robot fighting league, motorama, or Dragon-con.
Even though, if you talk to pretty much anyone, they'll remember robot wars, or say how cool robot fighting is...well, everyone except for university deans who say it's too violent and is contrary the school values, when in reality, beside the battles themselves...it's really just like FIRST, with teams helping each others, knowledge sharing, community building, etc. Some actual engineering competition are way more toxic.
I find that really sad, how a sport that EVERYONE think is cool, literally doesn't exist in my province. Now, since everyone seem to like it, maybe all it needs is a little push. In order to give that little push, I reached out to SPARC and asked them if I could translate all their documents in french. You have to remember, many people in this province speak only french, and, while they might be comfortable enough with English to browse Amazon, reading pages and pages of rules, standards, and specification is asking a bit too much.
So, I added a new page, on this blog, in french only, where the french translation of these documents will live. Here's the link, but it should also be in the top-bar. The first one, "Règles des matchs" should be coming by the end of February.
I will do my best to spread those document to makerspaces in the province, and hopefully this seed will sprout into a competition or two. Now, I cannot guarantee I will be able to continue translating these documents as new revisions come out, but I will try. I doubt there will be huge revisions anyway.
Turnigy Receiver Tear-Down:
I've had intermittent failures on my receiver. So I decided to open it to see if the last crash it had broke something internally.
It is quite well made for dissection. There are no clips holding it. It's only 2 screws (nothing hidden!) and 2 tabs on the other side, so it's built a bit like the battery-cover on the back of your calculator!
Gotta admire the simplicity of the thing. what I thought would be right-angled pins, are actually straight pins on an angled PCB. The only thing holding the PCB there is the solder...which is fine, since in that enclosure, the only force the thing will ever see is straight pulling force.
Now, I don't have a microscope...so I can't actually tell you what any of those pieces are. especially not those tiny resistors...or caps?...or whatever is in these...0201...01005? I don't know, at this size, i'd rather replace the whole thing than having to try even PLACE those things.
Anyway, turns out my problem was in mechanical interference. The case doesn't have proper tolerances, so in some places, the connectors push on the case, and then push on every other connectors subsequently placed...so if you remove one later, it also pulls on the second, making for a shoddy connection. I could have found that out without opening it...but then, curiosity got the best of me.
Dark Repulsor
I did the plans for it before, but I need to make this cosmetic piece at some point. One method I wouldn't live without anymore is making the plan for whatever piece i'm making on Inventor, and then sticking it on the stock i'm about to cut. For complex pieces like this, it's WAY faster than taking a pair of calipers and scribing cutting marks, and for simpler pieces, it is often simpler and faster to do it anyway because chances are you've already made a plan anyway...unless you want to just cut a rectangle, then it is simpler to cut to length and not stick
Dremel and Bandsaw time! Which it is ALL the time for prop-makers.
Dremel is love, Dremel is life...And I ended up with something like 6 inches of sawdust on my shirt (exagerating of course) Remember to wear a facemask/respirator when sanding that much off wood.
And how it looks from the same-ish angle as the anime. I still need the work on the handle, and then cast this piece to have an identical copy on each side. Sadly, because I hand sanded my piece, I have some overhangs in some place, so i'll need to use silicone resin, instead of cheaper plaster, to make a mold and cast the piece in urethane. Because
And compared to my source:
The handle is WAY shorter...because it's not a 4-handed sword!
Space Gun:
One of my plans this year was to make a gun prop. Recently, japan outdone themselves (as usual) and released a copy of the Dominator from Psycho Pass. If you haven't seen it, it's worth every second of this video:
AFDWHAFWCDQRWDX WANT! HOW MUCH IS IT? 86 thousand yen? WTF?...welp...
Guess what prop i'm gonna try to make? ;P I don't tink it's going to only take this year to make though, but then, it might end up being a collaboration!
Ocarina:
As some of you may remember, one of my goals this year was practicing Ocarina at every few days, sometimes with sheet music. Well, finding free (because poor student) sheet music for Ocarina is hard! Some websites, like STL Ocarina's forum and Songbird Ocarina have Tabs (fingering charts pretty much) but no sheet music. Even if I wanted to pay for it, the quantity of work made for Ocarina is...lacking.
As such, i'm going to take some of those tabs and translate them to sheet music. I'm going to put some of them (depending on their copyright licences and terms of use) right here.
So far i've been able to play bad apple without mistakes...at the correct speed...with only one or two slowdowns where I keep forgetting how to move my fingers.
After having finished Elucidator, I decided to give a try at making my own scabbard. As with any project where you make something for the first time, research is key. Thanks to our overlords at google, I found this page describing two historical, and an easy method of making scabbards.
http://www.yeoldegaffers.com/project_scabbard.asp
So, because I'm a bit lazy, I decided to go with the easy method.
First I made the rough shape.
Then I used scrap pieces to build the details. I also thinned the piece near the opening because it looked even fatter than your mom Weird Al in "Fat"
And the final result.
Now, those make it look like everything went well, but it didn't. At first, because of the thickness of the felt I lined it with, it was way toot tight, to the point where paint on the sword itself would get scrapped off. The only way I found to fix it without opening the whole thing, or sanding the whole sword ~1mm thinner, was to get a rough piece of wood, a whiff thicker than the sword was, and repeatedly insert that...implement, in the scabbard. As a result, some fiber on the felt stuck on the wood, and after a while, removed just enough for the sword to have a tight fit, without destroying the paint.
Dark Repulsor
Just a quick glimpse of what I'm working on. I'll probably be making it during the October school break, in between researching on carbon-fiber layup and CFD on rocket bodies.
Speaking of rocket bodies...
ROCKETS!
Since the FIRST robotics team I was managing doesn't exist anymore due to budgetary constraints, I decided to join a student project group once again. I was torn between Avion Cargo Laval, the SAE Aero design group, which really need more people, Robocup, a project to make a team of robots that plays soccer, with one of my friend, or the GAUL, which I actually wanted to join since they started up again a few years ago, but thought I was too inexperienced to join.
Since it's my last year and a half of university, in theory, I decided to not help my old team, or my friend. Instead, I decided to do what I always wanted to do; what actually put me on the path to being an engineer: rocket science.
The first team activity we did was build rockets together. We had a choice to either work on a team rocket, or get our own kit. Since I like diving in the deep end on my first try, and I really like making stuff, I got my own kit. I'm cheap though, so I went with the cheaper, smaller kit, called the Screech, thinking it would be a one time thing and that it would either break, get lost, destroyed, or that i'd have my fill with that one and the competition's rocket...
The completed rocket, Thjalfi-1, pronounced Thyalfi, just like Mjollnir is pronounced Myollnir and eyjafjallajokull is pronounced eiyafyallayokul.
Boy was I wrong. We went to Ciel d'Octobre and the rocket launching community seemed just so nice compared to the RC plane community. We launched 5 rockets in total, mine and another small kit like mine, the communal DX-1, and 2 rockets made by the team's senior launchers. My launch didn't go so well: first the wind got pretty strong near the end of the day, so we angled the launch pad maybe a bit more than we should have. Then, my color choice wasn't so great. Chrome is actually hard to see against a cloud cover AND cut corn, so everyone lost sight of the rocket at it's apogee. Finaly, the parachute didn't deploy properly: the nose was probably a bit too tight. I was afraid that was going to happen, because it was really tight...but since it was my first rocket, I really didn't know how tight it had to be. In any case, that is only conjecture because we didn't find the rocket in the end; maybe the chute did deploy and we just didn't see it; maybe it deployed but was burned by the explosive charge maybe...
I didn't see any cows, that's proof right?
In any case, that was fun. It reminded me of my youth, launching model rockets in the sand quarry in my hometown. I'm not satisfied with my launch though. I'm going to build a bigger rocket for next year, and get the certifications needed to launch it.
Welp, add rocketry to my infinite list of hobbies...which really could mostly be summed up as:
My wallet ._.;
AND IN THE NEXT EPISODE! WILL ROCKET CFD BE AN ACTUAL THING? WILL FRED BE ABLE TO FINISH HIS COSPLAY ON TIME? OR WILL HE BE KILLED BY THE OVERWHELMING COMPUTER-AIDED DESIGN CLASS?? FIND OUT...SOMEDAY.