Sunday, March 11, 2018

Printing testing extravaganza

A few weeks ago, I made what was supposed to be a 6 hours print (according to simplify). It ended up being 9 hours, keeping me up way longer than it should have.

So I want to find a solution. How can I get more accurate print time? I remember the estimates not being THAT bad in Cura...so what's going on? Let's try the other slicers and see.

So in short, the goal: Find out exactly how accurate, or not, each possible slicers time estimates are.

Here's a list of the softwares I've used:
  1. Cura v.3.2.1
  2. Slic3r 1.39.1-Beta 1 Prusa Edition
  3. Simplify 3D v.3.1.1 (Really old, I know, only one I have)
  4. Repetier Host v.1.6.2 
Models were sliced on Cura, slic3r and Simplify, saved as g-code, and Repetier was used to control the printer. However, Repetier also offer a time estimate for the print that is different from the ones in each slicer.

Four models were used. 
  1. Benchy, a standard calibration print that can be found here
  2. Owl Statue, scaled at 50%, model can be found over there
  3. Gear Bearing, with 6 planets, found here
  4. Knurled Bolt + Nut, 30mm length, found at this link
All the prints used the same setting:
  • 0.3mm Nozzle
  • 0.2mm layer height
  • 3 walls, top layers, and bottom layer
  • 20% infill
  • Hexagonal infil, except for Cura which doesn't have it and used grid instead.
  • 60mm/s printing speed

Then, for each slicer-model combination, the printing time estimate has been tabulated in the following table. The columns labelled [SLICER] + Repetier indicates Repetier's print time estimate of the [SLICER]'s g-code.


Estimates (minutes)CuraCura + RepetierSlic3rSlic3r + RepetierSimplifySimplify + Repetier
Benchy1221201221116065
Owl Statue157158110758794
Gear Bearing817913310194102
Knurled Bolt+nut888596627278


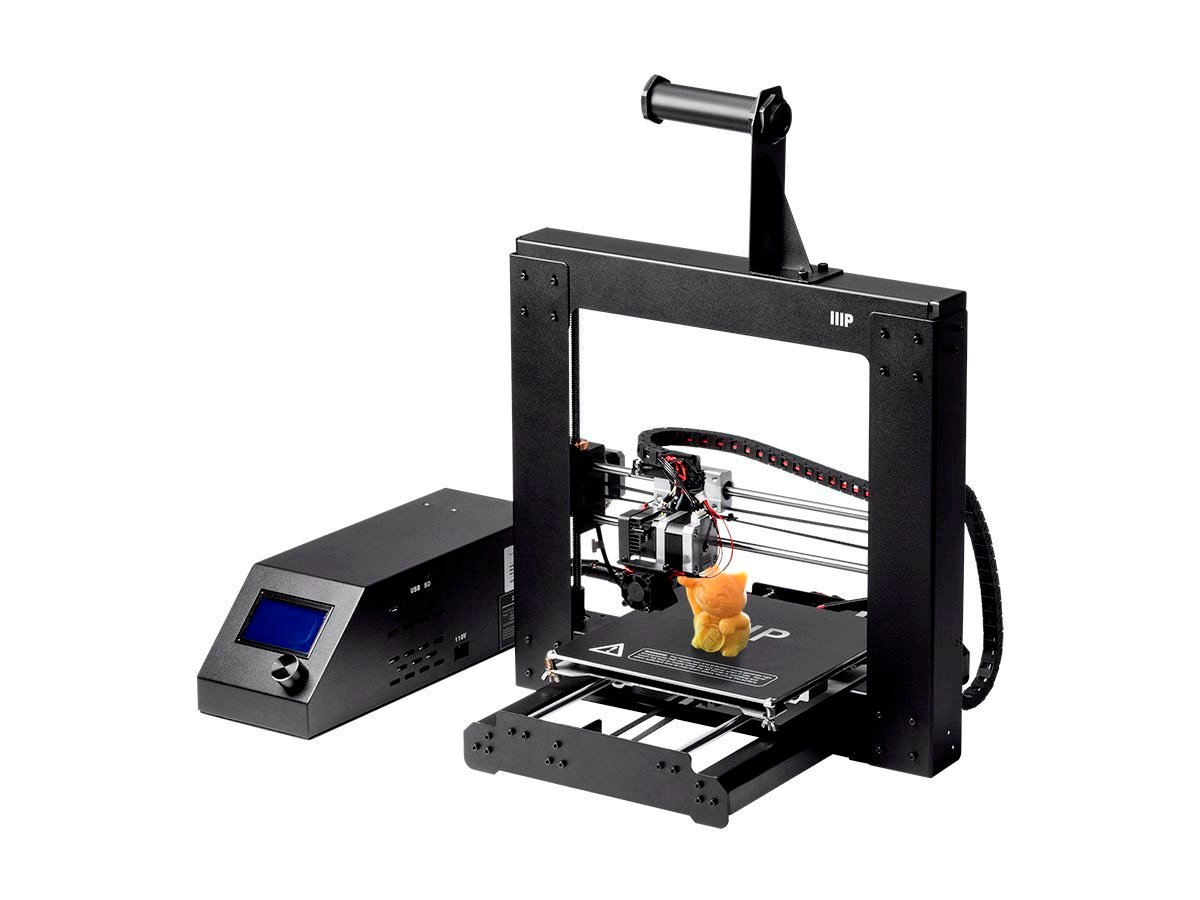
Now, all that's left is printing. Everything has been printed on the same printer so that is not a factor in comparison.


Actual (minutes)CuraSlic3rSimplify
Benchy15613687
Owl Statue202135136
Gear Bearing114159135
Knurled Bolt+nut120119123


Then simply substracting the actual printing time from the estimated time shows a better picture of error. An average of the print time errors are then taken, and the standard deviation calculated.


Abs. Error (minutes)CuraCura + RepetierSlic3rSlic3r + RepetierSimplifySimplify + Repetier
Benchy343614252722
Owl Statue454425604942
Gear Bearing333526584133
Knurled Bolt+nut323523575145
Average363822504236
STD DEV5451499


Well, at first sight we would then infer that Slic3r has the lowest error. But absolute error isn't that important. a 50 minutes error on a 10 hour print isn't so bad after all. What we really need to look at is the error as a percentage of the estimate. This will allow us to make predictions of print time in the future.


% ErrorCuraCura + RepetierSlic3rSlic3r + RepetierSimplifySimplify + Repetier
Benchy283011234534
Owl Statue292823805645
Gear Bearing414420574432
Knurled Bolt+nut364124927158
Average333619635442
STD DEV575261110


As you can see, with a 19% print time over the estimate and a standard deviation of 5% (so that 50% of print times would be between 14% and 24% over the estimate) Slic3r is the clear winner in print error.

Now, why is that? And why are they all so wrong?

I'm not interested in looked at the code to see what's what, but we can make guesses.

The main source of error, I suspect, is acceleration. To calculate print time, you need to know the length of all the moves (which the slicer has) and the speed of the print head at all time. So how do you know the speed? Well, you can assume infinite acceleration, which I assume is what Simplify does, but that will give you huge error...because acceleration is far from infinite. On my printer, we're talking 900mm/s<sup>2</sup>. When you have a lot of fast direction change and low acceleration like me, you might never reach your actual print speed during some moves.

What i'm assuming the other slicers do, is assume a large acceleration, but not infinite. Probably something like 3000mm/s<sup>2</sup> (which is the default for ultimaker printers...also makers of Cura...wink wink). Doing the same test with another printer, with more rigidity, that can support more acceleration, would be the only way to find out if my assumptions are correct. But I don't have one, so the exercise will be left to the reader to replicate my experiment.

If you try it, please leave a comment! I'd love to know your printer's acceleration, and how the print time error compares to my test.


Sunday, December 24, 2017

High-Power Rocket Initial Design

It has been a wild year since my last post. Crashed my old Fit, bought a brand new 2017 Prius, took my place as a junior engineer a lot more in my company, passed my OIQ ethics exam, tried to buy a house (and chickened out), finished a bunch of small projects that I won't really be talking about because I didn't document them, got more into the cosplay community...and left because I just stopped doing stuff.

Long story short, I want to get back into something I started getting into with the GAUL in University; High Power Rocketry.


So for the actual initial design:

Design Constraints:


  1. - Use Pro-38 casing (Because they're way WAY cheaper than Pro-54)
  2. - Can accomodate H to J impulse motor to be used as a reliable certification rocket from level 1 to 3
  3. - Gets as close as possible to 6000 ft with the biggest pro-38 J motor
  4. - Dual deployment
  5. - Use a stratologger for the altimeter.
  6. - Must NOT include crazy custom avionics, sensors, or other similar. (Although I do have some ideas for some for a future rocket from my time with the GAUL...)
  7. - Custom Avionics bay. None of this plywood and threaded rod bull crap.
  8. - Must not be 2 inches or less. Fisting a rocket is hard enough, no need to make it harder.

And all the USUAL design constraints of building a rocket:

      - Must survive launch, MAX-Q, Aerolastic effects, and touch down.
      - Minimum 4g of acceleration at lift-off to clear the rail with a speed high enough to be stable
      - Must be Stable with any pro-38 motors, from H to J.


Based on #3, you don't want to go too big in diameter. More Diameter = More surface area = more drag = less altitude. But then considering #8, there are only two real choices as far as rocket diameter go. 2.6 inches and 3 inches. Based on that, #1, #2 and #4 we can start messing around on OpenRocket.

Messing around, I ended up with two possible designs. One with a 2.6inch diameter, and one with a 3inch diameter. All tubes and nose cone measurements are based on allrockets.ca phenolic tubes.

Comparison of both preliminary design with a 819-J354-WH-16A-13


As you can see, the 2.6inch gets closer to 6000 feet with the biggest J Motor, gets so close...and yet so far, to being supersonic  (Mach 0.97 with a V-max), which sounds more fun, and looks WAY better.

The 3 inch version would be a lot less pain to fist, designing the avionics bay would be way easier, but the rocket would also be a lot slower (Mach 0.89 with a V-max), would go 300 feet lower, and look more boring overall.

And so in the end, I will be going ahead with the 2.6 inch initial design.

And that's it for today! My next post will either be me talking about the initial design of the avionics bay, or dismantling something.


Sunday, January 29, 2017

Done with Uni! The end of an era.

It's been a while I didn't post here, so here's some catching up.

I'm done with university. I only had one semester left to do, with two classes. One was a laboratory class, where, with a team of 3 other people, we had to calculate the efficiency of a shell and tube heat exchanger for it's whole range of operation. The other was a capstone design class where we designed, but not built, a diesel portable power unit.

The lab class was...fun. One of our teammates kept writing weird things...like..."Heat is the measure of the sensation of hot and cold"...wow? Anyway! The set-up looked like this:


The tube and shell heat exchanger is on the left. At the bottom of the exchanger there's a set of valves that permit the exchanger to be operated in either parallel or counter-flow configuration. On the right there's a water cooler along with it's tank, and behind the exchanger there's a water heater, also with it's tank. Temperature could be taken at 3 points in the head exchanger, using thermistances.

The capstone class...well, it took time. And while I didn't enjoy the subject too much, I really loved working with that team. One of the things I've worked on was a 3D-printed control panel.

The 3D printed control panel printing.

Now that school is out, I can re-start doing other projects! The first order of business is cosplay. There's a sword I've been working on for years (!) that I need to finish. I was scared of doing the detail on the handle and pommel, but with Nadeshicon coming soon, and me wanting to have a life and go out at cons...and not wanting to learn to sew yet...well, I guess I did it.

I had tried to carve out the details at first, but it didn't look right...so instead, I took a page out of Bill Doran's book (well...not his actual book...but still...) and made the details out of craft foam!


That makes the 4th material/fabrication method used in this sword. It has literally become a capstone prop making piece. There's wood carving, resin casting, 3d printing, and foam fabrication.

It was also my first time using my new dual-action, gravity fed airbrush and mixing my own paint. I'm really happy with the result too!


And finished! Here it is next to it's sister.

I've been neglecting wirting this post for the longest time, and the longer I waited, the more things I did that needed to be written. So i'm posting this one, and i'll try to write more often. I already have a few projects for which I have pictures that are done or almost done:

An old camera from a fighter jet that I disassembled
Ironwood's gun from RWBY
A cast of my own torso!

And I have way more projects that are in the work! So stay tuned!


Thursday, October 27, 2016

Quick Update


I'm not dead. I just haven't had any share-able projects so far, nor did I do much work on my project backlog. I did advance some things here and there, but work and school is killing me taking all my time at the moment.

Here's what I can share!

They're cleaning the warehouse at work, and I got to go home with a few interesting items. Some I will disassemble at some point...but first here's a box:

If only I could rotate pictures...
That I refinished.


Much nicer. According to the black tag, it used to be used for a Collimator that was probably used to check for planarity of big surfaces.

Not shown on the picture, but the box was all mangled. The tape was literally holding it together! As soon as I removed all of it, the bottom and the back fell right off. The front was fine though, so there was no need to tow the box outside of the environment. Nothing epoxy can't fix.

I also tried my hand at sewing for making a parachute for the rocket club at university.


This...stitch? Folding method? Thing? Is based on AC43.13, the FAA advisory circular for aircraft repair. The start of it is pretty ugly, but it holds together quite well. This is a great experience that will elevate my cosplay making skills to new levels!...that is, level one hopefully...because I haven't finished a single cosplay yet...

Speaking of cosplay, I finally grew a pair and added the molded and 3dprinted pieces to Dark Repulsor...now I only need to add details to the handle...and paint it. Haven't taken pictures though...I really need to get better about that.


Sunday, August 7, 2016

On sourcing components and tools

One of the hardest parts of any project is finding just where to get the pieces you need. Americans have it easy thanks to McMaster Carr, which, if you're lucky, will offer same day delivery (looking at you Charles <.<) or Amazon Industrial. None of those ship to Canada....except to existing customers in the case of McMaster.

So, how do Canadians get supplies to make...well, anything? It depends what you need, and how quickly you need it.

Most of the sources are included in the materials sources on my side-bar, but I thought it would be a good idea to make an actual post about it. I'm not paid to write about any of this. If you have other sources, feel free to leave them in the comments!

I'm in no Hurry and I don't REALLY care about quality

Ebay and various direct-from-china websites have everything you need, including a jet engine or two, probably. Thing is, you're pretty much guaranteed to wait at least a month for it (even if the ebay estimated delivery says in 2 weeks, it lies), and then 1 or 2 out of every 3 items might not work, or work a very short time, or get to you broken. I used to also buy from Aliexpress, but they don't accept paypal anymore... and i'm not ready to give my creditcard number to china just yet.

I want quality stuff/I need it in less than a month

If you want electronic parts, the regular American sites do ship to canada. Sparkfun, Adafruit, and Pololu are all very good sources...Adafruit and Pololu in particular since they have tutorials. Not only that, but the usual, more engineering-oriented sites work too. Digikey has a canadian website (Digikey.ca), and element 14/Newark ships to canada.

For electronics, Canada has a few shops of it's own too. Robotshop and SpikenzieLabs, for instance, are both based in the Montreal area.

If you need anything related to RC, motors, batteries, and such, Hobbyking's where you'll want to go. Their parts have been used in everything, from silly go karts, to Battlebots, to powering, and then blowing up with, MIT's rocket (not the batteries fault. after 4 tries you'd think they'd find out how to do a proper recovery...) I know some people wouldn't consider Hobbyking to be quality, but it's really the middle ground between very expensive quality and cheap piece of crap.

If you want mechanical parts...well, good luck. Misumi USA does ship to canada (along with being VERY expensive. 67$ for a 250mm long 8mm leadscrew with 2 starts? i'll buy 4 from china and hope one is actually straight and made of metal, and only pay 30$ TYVM) and when you really need it it's there. Surplus Center ships to canada, and also kind of have a Canadian equivalent called Princess Auto. Fastenal is there for all your fasteners needs and is getting more and more products trying to compete for the hole McMaster left in the canadian sources, as is Ackland-Grainger.

Also, amazon.ca has some stuff.

I don't need no electronics or tools, I need raw materials!

Getting raw materials in canada is so hard, unless you're a company, or willing to pay (and have the space to store) 1000$ worth of steel or aluminium at once, no metal selling companies will want to talk to you. Some machine shops do sell in small quantity, but in my experience they tend to see you as a nuisance more than anything else.

Enter Online Metals. Want 0.5" titanium plate? You got it! Need C385 brass flat bars? got that too! Tool Steel? of course! 1100 Aluminium? Unless you want to make something out of actual Inconel, they'll have everything you need. While they have aluminium, I wouldn't recommend using them for aluminium. Instead, go to Aircraft Spruce. Because they are canadian, they don't have the antidumping tax american companies (like online metals) might get hit with. They are also a good source of carbon fiber, glass fiber, and epoxy. Both also sell plastics.

If you don't need wide sheets of metal, Sidecuts might be a cheap source too.

I want cosplay/Artsy stuff

Canada has a good source of cosplay supplies, although I can only really mention the ones I've used.

Sculpture Supplies is my source of Smooth-On products, but they have everything related to sculpture; tools, materials, Worbla. But finding something on their website can be hard sometimes if you don't know the exact name of the product you're looking for.

If you want EVA foam, there's only one place that sells REALLY great EVA foam. TNT cosplay! (they also have Rytlock Brimstone on their main page, so why WOULDN'T you want to buy from them?)

I want...information

Then go look at websites! Try finding blogs or youtubers that happens to do something related to what you want to do.

Charles Guan
Bill Doran
Kamui Cosplay
Evil Ted Smith
Jimmy Diresta
Clickspring
Dan Gelbart
Matthias Wandel


Friday, July 1, 2016

On rocket launches, internship, and electronics.

As some of most of you know, I'm a member of the GAUL, the "Groupe Aérospatial de l'Université Laval"...or the Laval University Aerospace Group, but then LUAG doesn't sound good...and LUA group sounds more like a programming language group...anyway.

Way back in...erm, May? Right after the finals, we finalized the rocket's design and started building it. Being in the aerostructure team, aka 'Mech E. guys that talks about Reynolds and Young' I volunteered to help build the structure, and, thanks to the help of my spray paint expertise 'Shakes fist at Elucidator', paint it in time for the reveal at the Montreal Cosmodome.

Our initial design for the structure was supposed to be a tube with 2mm thick wall made of carbon fiber. That sizing was done considering that the rocket's most important stress was in compression, at ignition. Which means that the carbon fiber...fibers only took away from the strength of the epoxy because fibers are only good in tension. Sadly, we didn't receive our carbon fiber on time, and had to do with glass fiber. Since that wasn't what we did our design calculations with, we went very conservative and decided to have a more traditional design: an inner cardboard tube, with 2 layers of glass fiber, and 2 layers of carbon fiber we had lying around.

Structurally, this is a beast. Weight-conservation wise...erm, let's not talk about it.

The only picture of the structure before it was painted

Once that was done, I also 3D printed parts for the payload team. Here's the structure for a fiber-optics gyroscope. That was easily the biggest single part I've printed so far!
A gyroscope or a plasma grenade?
Then came a rushed paint-job to have something ready for the unveiling of every Quebec team participating this year. then stripping it and making a good paint job. Doing that I've learned a few things:


  • Sanding is a pain.
  • Fiberglass is a pain to finish.
  • Some canned paint don't play well with each others, and sometimes even with itself (Krylon colomaster white, i'm looking at you).
  • Sanding after your paint screwed itself is a pain.
  • Using water-based fillers (like wood filler) is a BAAAD idea. They soften once they get painted on, and they stay soft. THAT'S why cosplayers use Bondo or Quick Seal
  • Sanding after your filler didn't stick on the rocket anymore after painting it is a pain.


But in the end, we ended up with something semi-decent (and which I didn't take pictures of)
The only picture I have 
And almost immediately after, OFF WE GO! We went with 2 rental cars and a van. We followed each others until the American border at Sarnia. We all went through one after the other, but somehow one of the team missed the restaurant WITH THE GIANT 60-foot american flag, and so after the border we just went.

The giant 60-foot american flag one of the cars managed to miss...

The drive as a whole was quite boring. One person drove, another person co-piloted, and the last one was sleeping in the back, rotating each roles every 6-8 hours...so it's also a blur. I took a few pictures of the...like...3 interesting thing we saw on the way.

I must say I was expecting the Mississippi to be...larger. Took near Davenport. Maybe it gets larger farther south?
Surprisingly small.
It was also my first time seeing the rockies.

Took near/in Denver, Colorado
My sub-team got there first! We took 44 hours, including the one time we stopped to sleep. We even beat the guys who flew to Salt lake city. Then we started working on the integration of he electronics and the payload.

And there it is! The payload is in the payload bay! and finally we can drill the holes for the nose cone. 2 weeks later than I would've liked, but oh well.

And now the competition! We're launching far away from town...like 30 minutes away, in the middle of the desert. Well, 'Desert'. That was way more green and alive than I was expecting. But then we also got a few dust devils...so meh.

Base Camp,. you can see the launch rails if you squint real hard.


Our launch went pretty well! Beside the...erm...structural integrity problem where, when our drogue chute deployed, the sheer pins holding the main also blew (oops) and thus our main deployed near apogee. That made the rocket go really far. When it landed, it also dragged on the ground for like 400~500 meters because of our gigantic chute and the high winds.
You can see the mark of the rocket dragging on the ground.
We ended up in 4th place, and our fiber optic gyroscope got an honorable mention!

Then we went and visited the Arches national park. If you're ever in Utah, GO THERE! it's so beautiful.


Internship

While construction of the rocket started, I started working at Lortie Aviation as an intern. They own a fleet of 16 Hawker Hunters. My job there is to update drawings and support the avionics department.

Some Hawker Hunters

As a student in mechanical engineering who also enjoy some electronics, and who realize that, thanks to robotics, even mechanical engineers will have to learn some electrosities...and a follower of weird battlebots #Overhaul2, oh, also, jets?!

This is like a dream internship! I get to see jet engines being overhauled, and the very important links between electrical and mechanical systems...or between any systems for that matter. While I've worked on 'complex' projects before with FIRST and SAE Aero Design and Gaul...most systems were...mostly independent.

Oh, I also learned circuit and PCB design is a pain, you have to take way too many things into account (Thermal Management, Power Dissipation, Electromagnetic Interference, Noise in general, filtering, coupling, impedance matching, breadboarding, timing...) , many of which is hard to account for before your prototype is actually built and then you have to start over with that new information...and then making that prototype you've probably released the magic smoke on a few components (50$ DAC here ._. among other things).

Sincerely, if you know an EE...hug them, they deserve it.


SPARC Standard rules

Translations are coming soon(tm). I severely overestimated the time it would take to translate, and my free time. They should be ready by the end of the year (probably).

Friday, April 29, 2016

Adventures in 3D printing, and the end of the semester.

3D printing

As I mentioned in my last post, I ordered a 3D printer off Monoprice's Ebay page. They had a very nice deal: a prusa i3 clone for only $309, or, shipped and taxed and everything, 478 canadian pesos.

The printer. Monoprice Maker Select, or Wanhao duplicator i3, or Prusa i3 or...
This printer has more clones than Jango Fett! That is, surprisingly, a good thing. The development of this printer came out of the reprap community, and started in 2012, 3 years after I saw the very first mendel, and tought that 3D printing was super cool awesome, but would never be economical due to the price of non-printable parts, like motors and electronics. Welp...thanks china! We now have decent (ish) printers for $300 (on sale, but still)

When it came, I was expecting it to be essentially non-working...or to print like this:

Surprisingly, that's not what happened! Let's start by the beginning though, the opening. Here's the box. Beer for scale (because I didn't have a banana)


The manual, which is pretty much useless when you've been gorging on websites, blogs, subreddits, youtube videos, google groups, etc.

The power supply electronics box. Everything beside the 4 stepper motors, the limit switches, and the heated bed is in there. That's where most of the pixies are dancing. There's a micro-sd (WHY?) slot on the side, along with a micro USB (Which you can't even USE unless you go inside and remove a jumper. What the hell?) There's also a switch-you-must-never-touch to switch the power supply between 110 and 220 volt modes.

The heated bed and the y-axis. Everything is pre-wired....which is both good and bad. Good because wiring in general is a pain, bad because it makes it really hard to get out of the box by yourself. The butterfly on the bed is essentially their QA check I guess. Making the printer run before shipping it, and showing the customer that it did work...at least before being shipped.

But I DID manage to get it out! Ignore the harry potter on the wall, that has been there for way too long, and i'm not supposed to stay much longer, so removing it is way too much effort for what it's worth.

Aaaaand assembled. That was actually really easy!

Then, the other box.

Electronic box cable, a USB cable, micro-sd card, a free complementary scrapper, spool holder, and allen keys. Metric allen keys. At this point I should mention this: EVERYTHING on the printer is metric. Most 3D printers are metric actually. I think it's a good thing, and might actually help americans switch slowly to metric. (Unless they're all using stratasys printers, then we're screwed)

While i'm here, I want to point out some weird design choices. Like, why is this belt pulley fixed only on one end? and with a BOLT? I mean, bolted connections aren't known (or used, EVER) for their strength in flexion. And why did they use a flat cap? had they used a socket cap I could've put a zip tie or something to help, and make the bolt (and zip-tie) force in shear...but nope, stuck with that. I'll need to go buy an M4...or 5, can't really know without taking it off, socket cap screw and zip-tie it.

 Enough whining, I only paid 478$ for it anyways, time for printing!

It works!

 It...oh, wait, it separated from the bed and got stuck to the nozzle...ooh.

I did manage to get something printed though (from the sd card) It's about high! I have a chair! a 3d printed chair for ants!

I don't want to print via SD card forever though. What happens if you try to print from the USB port is...the printer resets. You have to go in, open the electronics board, and remove a jumper. The one nicely labelled "Auto-reset" right above Arden of the Ardentissimo. Another bad point here, EVERYTHING is hot glued. I understand that for transport these days, with courrier services pretty much playing soccer/football/football with parcels, you want to connect things in a way that won't come undone. but i'm disapointed nonetheless. It's a bit overkill...and I will hate it if that board dies. Or if the power supply dies, as chinese ones often do.

Now that I can print from USB, the calibration can commence! I had a hard time to even print since that chair. Nothing would stick to the bed, and leveling didn't help. At that point, I found out my aluminium build plate gets a "nice" dome shape whenever it's heated. Thanks, thermal expansion! (not the minecraft mod) So until I get a glass plate, I can only print in the very center of the bed. Oh well, that will do for a few days. Then, things STILL wouldn't stick. So, I thought the raft looked pretty anemic. At that point, I thought I might not be extruding enough plastic. On to E Step calibration!

A nice calibration guide, for any printer, is this one here: Calibration guide

E-step calibration is pretty much the act of telling your printer's firmware how much steps/mm of filament it takes. For my printer, the default value was 96. What you do to calibrate it is to make a mark on your filament, 110 mm from the top of the extruder, then tell the printer, through a program that can send gcode like pronterface, to extrude exactly 100mm of plastic. the ratio of 100mm over what actually came out is the value by which you should multipliate your estep.

And that worked! got a 3D benchy to print. It's measurements are...okay. 32.1 wide, 59.85 long, and 49 high, instead of 32, 60, and 48. The 49 is what annoys me the most, the others are...pretty much spot on (for an out of the box printer) 150 off microns isn't bad when you think the best FDM printers claim 50 microns.

 Then I printed one of MAKE's 3d printer shoot out test models, the dimmensional accuracy one to be exact. My x and y are pretty spot on. You see a the top a small problem though! That is due to 2 things: poor cooling, and me not putting back the extruder setting to 200 degrees after messing around with it, before calibrating my e-steps. So the PLA might have been extruding at 225 degrees.

Because of those cooling problems, (which you can also see in the door's overhang on the benchy) I decided to print a cooler! the diii cooler. I'm doing longer and longer prints! That one took 7 hours.

Printing the diii cooler was a mistake though. I should've printed the cobra... the diii cooler has REALLY low visibility at the beginning of a print, and strings like to stick to it. oh well, I wasted what? 28 grams of plastic out of a kg spool. not too bad.

My next print took WAY longer. The diii cooler needed an adapter to use the stock 30mm fan, and, well, I wanted to get on reddit's 3d printer bandwagon and print The Pink Panther Woman. I won't share a picture, because it's not safe for work I guess.

The next print, which was going to be going for 23 hours, screwed up like this:
 I have no idea what happened. I stopped it and spent a few hours leveling the bed again. But then I noticed I could never get it level! I always had 1 corner that would be way too low, or way too high, and whenever I fixed it, the other corners would screw up. and another would become too high...the cause? my y axis slide-shafts aren't co-planar. Something to fix in the future. For now, I can print well on 3/4th of my bed. I'll finish printing a few mods, and then get down under the printer and fix it.

I've also started 3D printing rocket parts!


And obviously, parts for the printer itself!


I still have a few upgrades i'm planning on doing: Making an enclosure to print ABS, and switching the hot end for a micro-swiss all metal one. Also changing the print cooling fan since the first one crapped the bed. I'm also having a few under-extrusion trouble since a print failed catastrophically (but I don't have pictures, I was more panicking on cleaning the printer and making sure nothing exploded). While frenetically tring to fix it, I noticed the extruder stepper were getting a bit hotter than I like. I'll check the voltage reference, as a common problem on this printer is that it's set too high for the stepper, causing overheating and skipped steps.

End of the semester

I'm actually taking a break from studying for my last exam EVER (well, beside the order's ethics exam in 3 years or so). I still have one semester to go in my bachelor, but the 2 subjects I have left are my capstone design class, and a fluid lab both of which are reports-based. I've also found an internship for this summer, which is required in my program. I was getting worried I would be only missing that to graduate.

So i'm pretty much guaranteed to graduate for christmas! yay!