Saturday, March 5, 2016

Spring break week! Old electronic equipment salvaging.


Midterms are (semi) over! Springbreak is here! What best way to start spring break than by doing some electronics salvaging!

Cleaning up the basement, I realized I had an old all-in-one printer, and an old scanner, taking wayyyyy too much space. Instead of just throwing them out, or giving them away, I decided to salvage them for parts. I knew I would end up with a few DC motors (enough to make a battle robot maybe?) and a few precision-ground shafts.

This is going to be a looooong, image heavy post of me disassembling both.

Printer

Starting with the printer. It's an HP Photosmart C-3180 all in one printer.


Each sides have 2 screws, and are easily removable. No clips! What kind of madness is this? I was expecting clips everywhere! From this side I already see one of the shafts.


And gears!

Two screws on the case-side of the cover holds the whole top. This time there are tabs on the front, but just gently sliding the cover up and forward makes it pop off.
Under it, we find the top control panel, and the clear glass. The glass is held by 2 tabs on the right corners, and 1 piece of plastic screwed in the top, holding the left side.

Here's a better view of the piece of plastic holding the glass, along with the LCD and control panel on the left.

With the top gone, we now have the digitizing head exposed. Humm, why is the ribbon going to the motor so big? what is going on?

Wait...is that...yes! that motor has relative-position feedback!...or maybe speed? In any case, i'm pretty sure both can be done with this encoding wheel.


Going deeper, removing those two screws let you remove the whole top where the scanner thing would slide on.


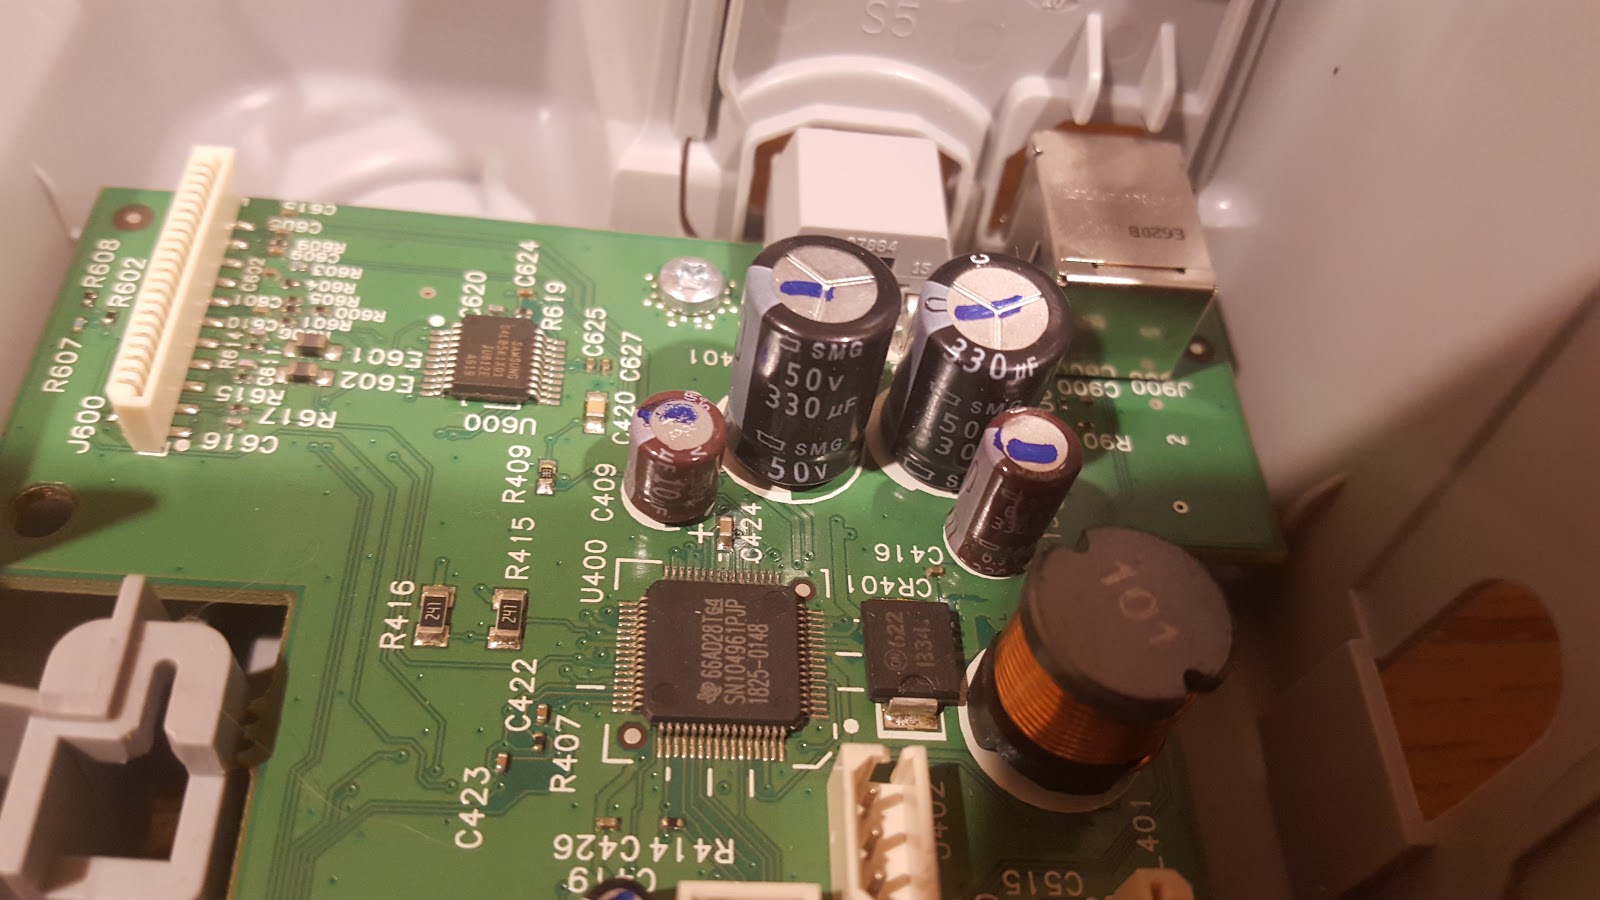
And we're in like Flynn! From here we can see the cartridges, along with their controller.


This thing is what controls the jet of ink. It also has positional feedback thanks to a ruler with very fine lines printed on it. A photodiode shines light through that ruler, and a photo receptor then send a signal every time a black bar flies by. And I do mean FLY by. The lines are barely visible to the naked eye, and the print head is moving awfully fast! If you want to know more, go here.


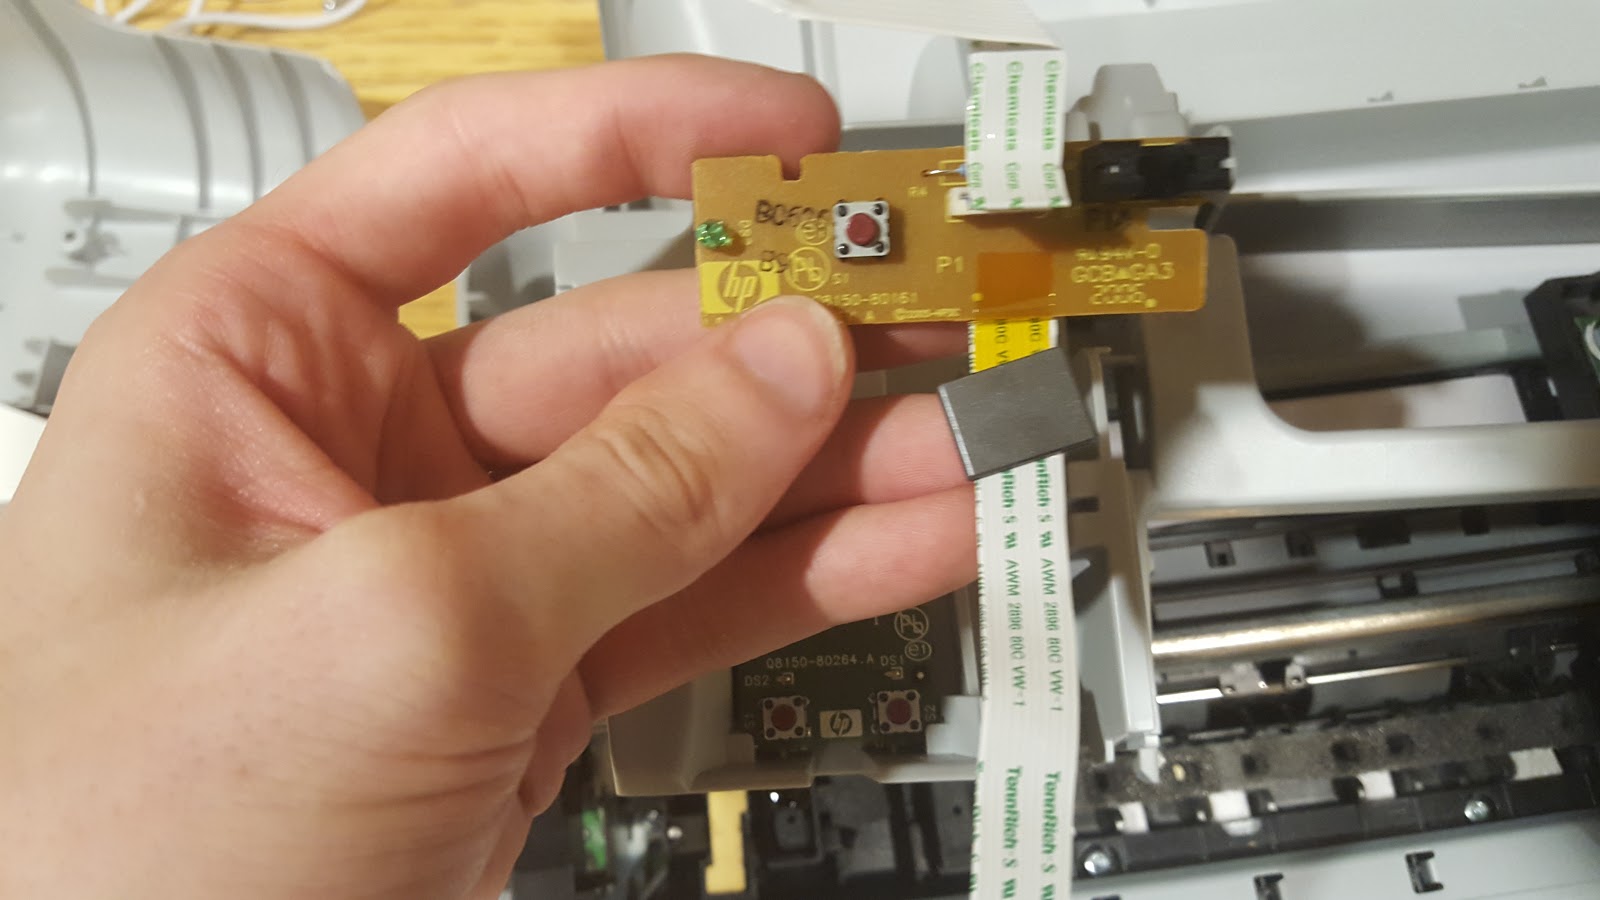
The power button! So cute! And a ferrite bead just for it? wow.

Here you can see one of the 3 precision-ground rod used in the printer. This is the one the printhead slide on! It's held in place on both side with a circlip, and on this side, it's also attached to a spring. Is it for positional accuracy (so that the rod would always come back toward the back side) even though the sheet metal work can't be too accurate, or is it a structural vibration thing? no way to say easilly...and i'm too lazy to actually put everything back together test it with the spring on, remove everything, remove the spring, and try to see if there's a difference to the print quality (or vibration, but I don't really have the tools to test for that)


Once the circlip is removed, the rod slides out easilly.


A few pictures of the printhead. I couldn't find a way to remove the pcb from the plastic casing...so all in the trash it goes!


Some more sheet metal removed. We see 2 more rods, and 2 motors! Nice!


I must admit, the way this rod attached to the sheet metal was...weird. I broke the plastic to remove it, but it sure felt there was a correct way to remove it...


Part of the gear train that is used to take pages from the tray, and push them around in the printer.


Most of those gears are press-fit. What really surprised me was that the rods have small gear-like tooth cut into them. Apparently, the plastic gear is molded with the hole being a bit undersized for those tooth, and the press fit operation actually force them in the plastic, forcing them to be solidly attached in rotation.


From this point on, I don't really know what I was doing. I was simply trying to get to that last rod.




Final loot. Many push-buttons, 3 DC brushed motors, 4 precision-ground rods, 4 springs, a few gears I probably won't use, and 1 pane of glass.


All in all, that was quite fun to disassemble. It's always interesting to see just how much engineering goes into even a cheap printer. All the molding, the sheet-metal work, and the easy of assembly (or disassembly). Now, hopefully one of those motors have the same specs as one of my other ones so I can build something with two wheels...

Scanner


Removed the 4 screws. The doesn't want to pop-off...humm...oh noes


Clips, clips ALL around the border. This isn't gonna be easy. humm, why is it only that black border that came off? why is everything still in one piece?


MOAR clips! Sorry for the blurry picture. The top was ALSO held with clips. Pretty much everything is held with clips.


The glass pane is actually double-sided-taped on


The electronic board for whoever's interested in those kind of things. I'm not qualified to say anything about it.


Well, that SURE looks like a 3d-printer drive...
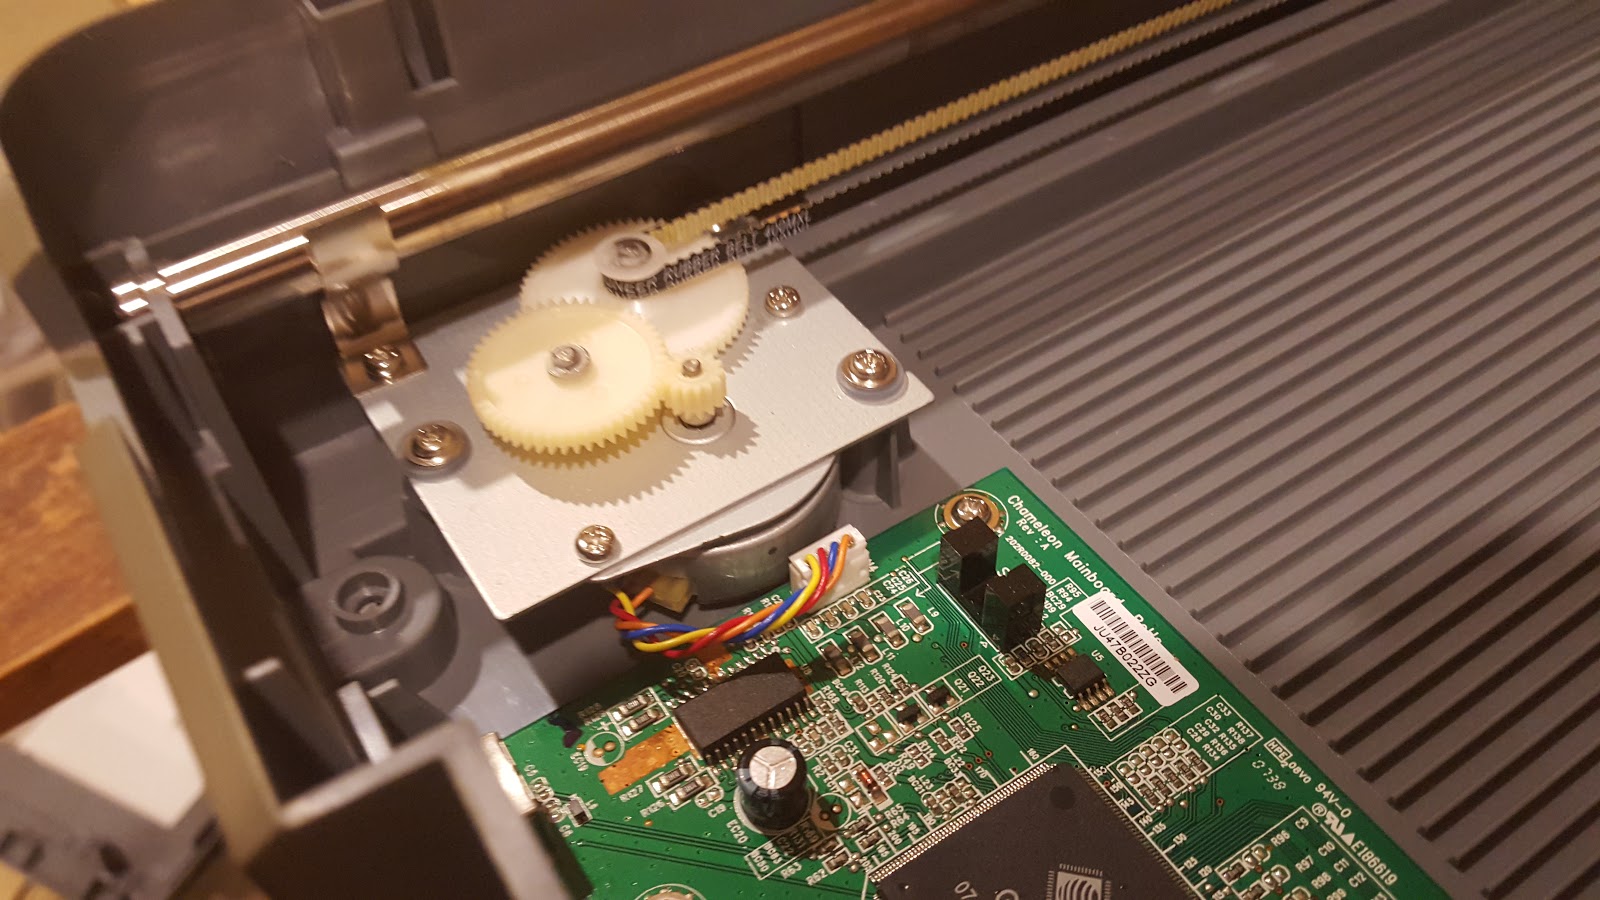

No circlip here. The injection-molded shell has a clip for the shaft.


Looong shaft.


The belt is tensionned used a spring. Quite ingenious. i'm surprised I haven't seen that in any belt-driven 3d printers...but then I haven't seen that many of those either so meh.


I guess that's the CCD control board...


It says caution everywhere...halogen lights drivers?


The lens.


Yep, it was the CCD control board. The money shot! That's my first time seeing a "naked" CCD.


Allright, enough electronics, people will wonder why i'm in mechanical engineering again...let's look at the motor. Wait, does it has 4 wires going to it?


Yes, yes it does...humm, that....that is not a DC motor. Can't find a Datasheet, but according to alibaba, that's a 2 phase stepper motor. I have no idea what it's resolution is, but i'll be testing it later. Using this, they didn't need to use a linear encoder like the printer did.


Loot from the scanner. I'm keeping the CCD because...well, i'm sure i'm not the only one who's never seen one. The motor and the shaft will be useful, the rest i'm keeping mostly as curiosities.


Update on my Goals for this year:


I've been bad. With midterms coming, I focused on that, and set the goals aside. Had I tried a bit harder, I could've fit everything in. 

I was starting to hit a wall with the guitar, where I could play each song up to a certain level...but then any harder and everything comes crashing down. I think I need to review that a bit, maybe start trying to learn specific songs using tabs, instead of rocksmith, and play them in slow motion, and then faster and faster.

As for the Ocarina...well, everyone around me apparently hates the sound of it. So I stopped doing that too, as I was getting yelled at. I'll start again when I can play outside I guess...which means not right now, because I don't enjoy frostbites.

As for math, until my midterms, I've had problem finding exercise sets.

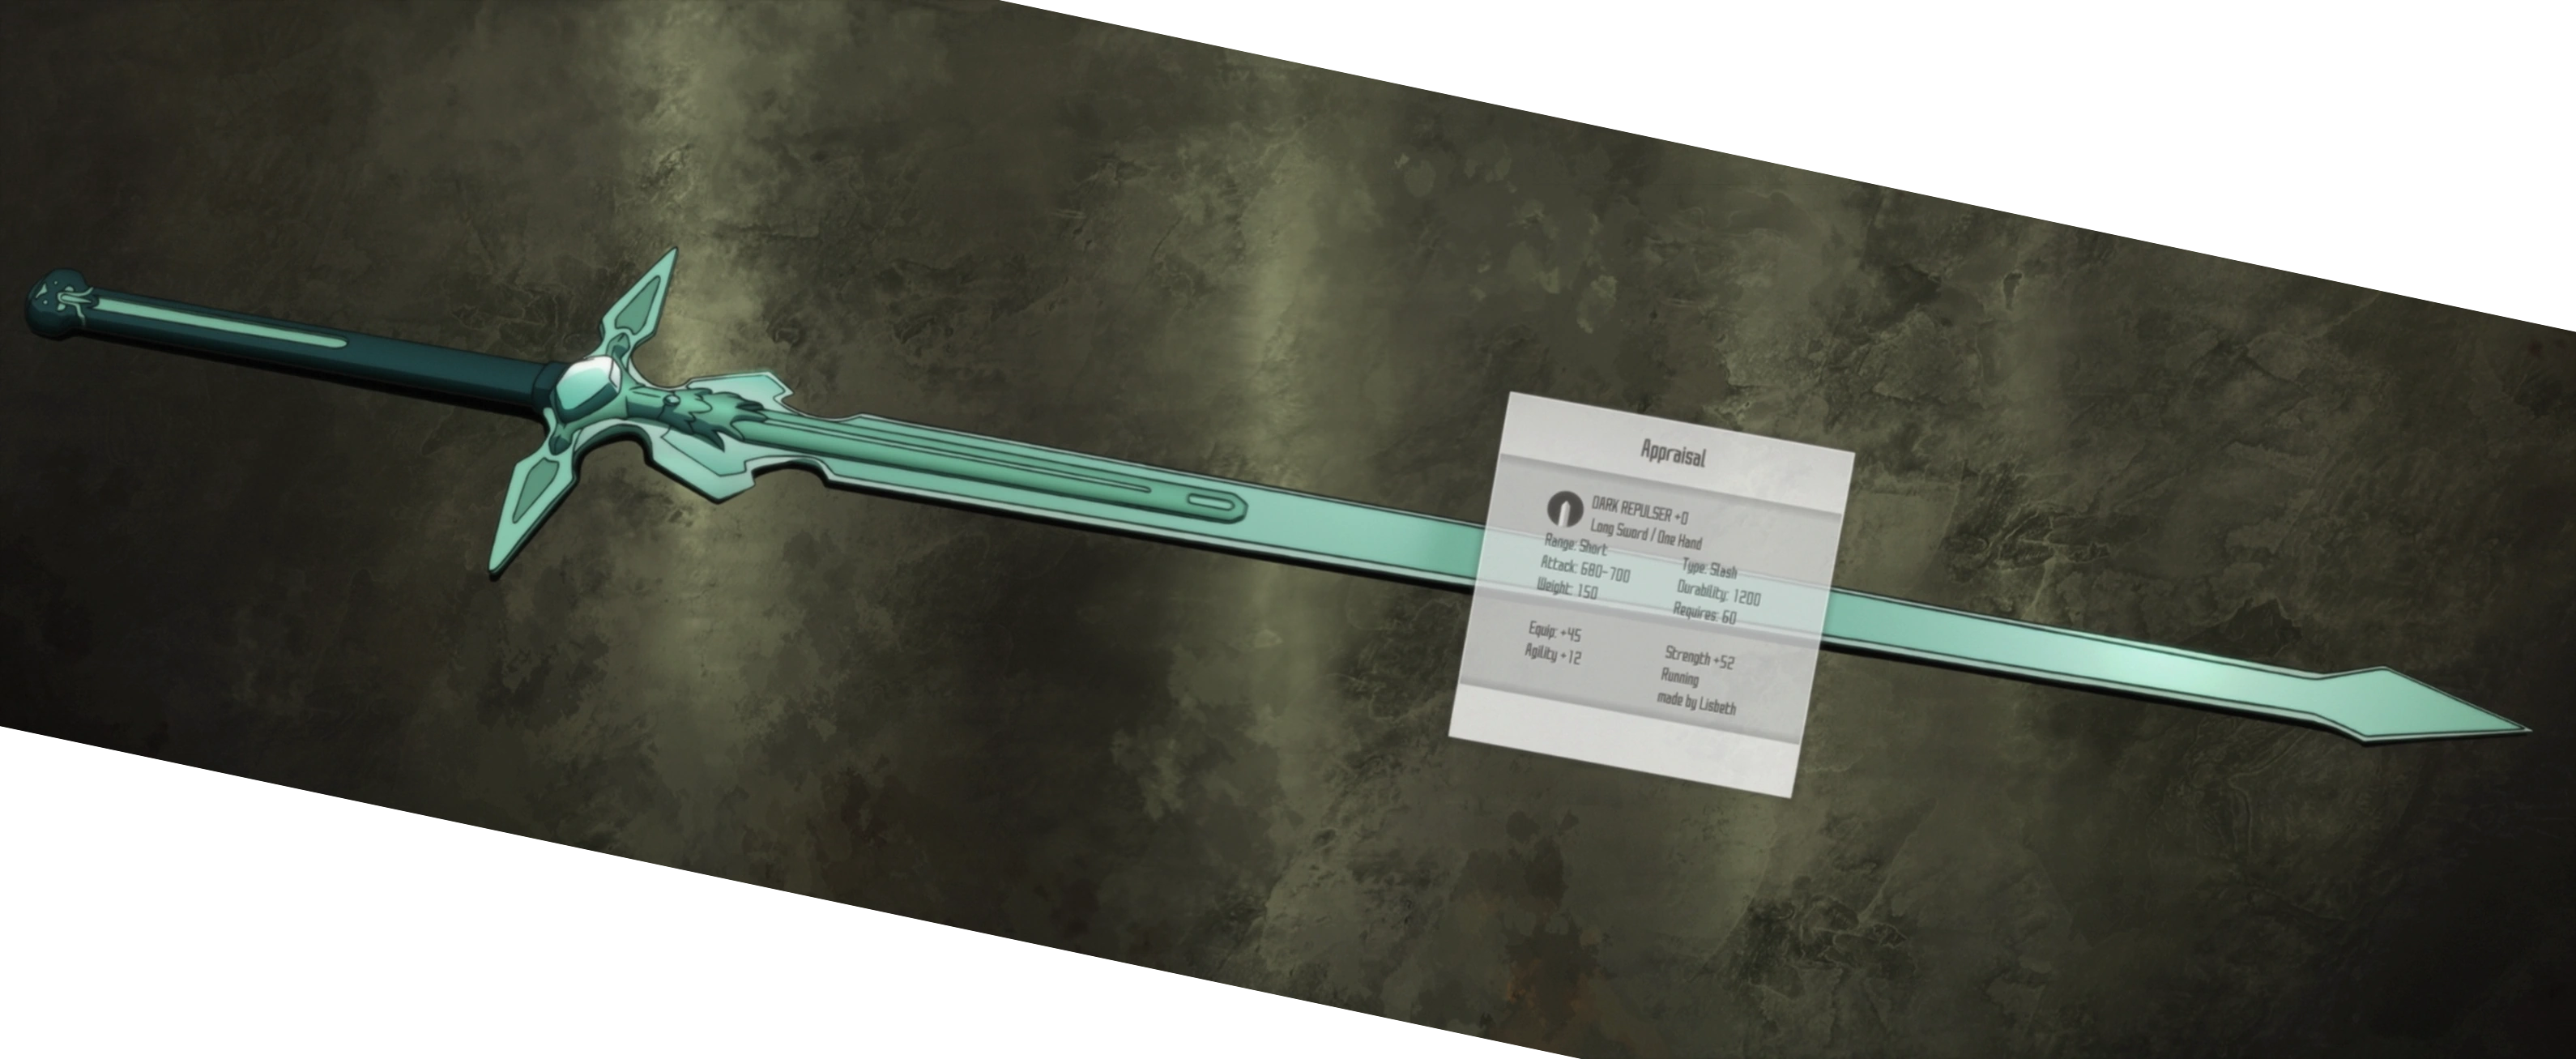
During spring break I got a sudden windfall of money, in the form of the vive being WAY too expensive for me with the current Canadian dollar. As such, I ordered some silicone and urethane resin to finally finish Dark Repulsor. This should be coming in the next week.

Finally, I read a book! One that wasn't related to engineering! It had been such a long time, I had kind of forgot what it even felt like, how you could get sucked into it. The book I read was "An Astronaut's Guide To Life On Earth" by Chris Hadfield. Now, i'm tremendously bad with names, I can barely remember the name of some people I interact with every week! Mr. Hadfield is one of the people, along with Adam Savage, Phil Plait, Elon Musk, Carl Sagan, Neil de Grasse Tyson, Bill Doran, Gabe Newell, Bill Nye, Charles Guan, and Stephen Colbert, whose names I remember easily, because I look up to them. So, it was that much easier for me to read the book.

What I took from the book was this: Humility is one of the most important thing. Be a knowledge sponge. Aim to be a zero, that is, to not be seen as a drag ( a minus one) nor as a know it all, above everyone.

Those, without ever having being said that way, have always been my goal as a human in engineering. Coming from a family with many technicians, all I ever heard about engineers was "Stupid engineer did X again, we told him it was a dumb idea" "We all know, they never listen to us technicians" "Stupid engineer, always so full of themselves, always making themselves to be more important, to appear more intelligent, more X than us". I don't think that is healthy, in any organization.


That is it for this post. Spring break is coming to an end (notice how I said it just started in the first paragraph...). This is probably going to be my worst post ever, as I just want to get it through the door...in a timely manner, and not in June. Next up! Rocket Building (maybe), French robot battle rules posting! Working on my first mold! And other unforeseen stuff.


Thursday, February 11, 2016

Robot fighting document translation

One of the things that annoyed me when I was working as a FIRST team manager was how, whenever I mentionned robots and competition together, people would always, ALWAYS, say "Oh, you mean robot fighting, like Robot Wars?" (Except they're saying it in french). Now, unlike the USA, and Saskatoon, we don't have fancy pansy robot fighting league, motorama, or Dragon-con.
Even though, if you talk to pretty much anyone, they'll remember robot wars, or say how cool robot fighting is...well, everyone except for university deans who say it's too violent and is contrary the school values, when in reality, beside the battles themselves...it's really just like FIRST, with teams helping each others, knowledge sharing, community building, etc. Some actual engineering competition are way more toxic.

I find that really sad, how a sport that EVERYONE think is cool, literally doesn't exist in my province. Now, since everyone seem to like it, maybe all it needs is a little push. In order to give that little push, I reached out to SPARC and asked them if I could translate all their documents in french. You have to remember, many people in this province speak only french, and, while they might be comfortable enough with English to browse Amazon, reading pages and pages of rules, standards, and specification is asking a bit too much.

So, I added a new page, on this blog, in french only, where the french translation of these documents will live. Here's the link, but it should also be in the top-bar. The first one, "Règles des matchs" should be coming by the end of February.

I will do my best to spread those document to makerspaces in the province, and hopefully this seed will sprout into a competition or two. Now, I cannot guarantee I will be able to continue translating these documents as new revisions come out, but I will try. I doubt there will be huge revisions anyway.


Turnigy Receiver Tear-Down:


I've had intermittent failures on my receiver. So I decided to open it to see if the last crash it had broke something internally.


It is quite well made for dissection. There are no clips holding it. It's only 2 screws (nothing hidden!) and 2 tabs on the other side, so it's built a bit like the battery-cover on the back of your calculator!


Gotta admire the simplicity of the thing. what I thought would be right-angled pins, are actually straight pins on an angled PCB. The only thing holding the PCB there is the solder...which is fine, since in that enclosure, the only force the thing will ever see is straight pulling force.


Now, I don't have a microscope...so I can't actually tell you what any of those pieces are. especially not those tiny resistors...or caps?...or whatever is in these...0201...01005? I don't know, at this size, i'd rather replace the whole thing than having to try even PLACE those things.

Anyway, turns out my problem was in mechanical interference. The case doesn't have proper tolerances, so in some places, the connectors push on the case, and then push on every other connectors subsequently placed...so if you remove one later, it also pulls on the second, making for a shoddy connection. I could have found that out without opening it...but then, curiosity got the best of me.

Dark Repulsor

I did the plans for it before, but I need to make this cosmetic piece at some point. One method I wouldn't live without anymore is making the plan for whatever piece i'm making on Inventor, and then sticking it on the stock i'm about to cut. For complex pieces like this, it's WAY faster than taking a pair of calipers and scribing cutting marks, and for simpler pieces, it is often simpler and faster to do it anyway because chances are you've already made a plan anyway...unless you want to just cut a rectangle, then it is simpler to cut to length and not stick

Dremel and Bandsaw time! Which it is ALL the time for prop-makers.


Dremel is love, Dremel is life...And I ended up with something like 6 inches of sawdust on my shirt (exagerating of course) Remember to wear a facemask/respirator when sanding that much off wood.

And how it looks from the same-ish angle as the anime. I still need the work on the handle, and then cast this piece to have an identical copy on each side. Sadly, because I hand sanded my piece, I have some overhangs in some place, so i'll need to use silicone resin, instead of cheaper plaster, to make a mold and cast the piece in urethane. Because


And compared to my source:


The handle is WAY shorter...because it's not a 4-handed sword!


Space Gun:


One of my plans this year was to make a gun prop. Recently, japan outdone themselves (as usual) and released a copy of the Dominator from Psycho Pass. If you haven't seen it, it's worth every second of this video:


AFDWHAFWCDQRWDX WANT! HOW MUCH IS IT? 86 thousand yen? WTF?...welp...

Guess what prop i'm gonna try to make? ;P I don't tink it's going to only take this year to make though, but then, it might end up being a collaboration!

Ocarina:


As some of you may remember, one of my goals this year was practicing Ocarina at every few days, sometimes with sheet music. Well, finding free (because poor student) sheet music for Ocarina is hard! Some websites, like STL Ocarina's forum and Songbird Ocarina have Tabs (fingering charts pretty much) but no sheet music. Even if I wanted to pay for it, the quantity of work made for Ocarina is...lacking.

As such, i'm going to take some of those tabs and translate them to sheet music. I'm going to put some of them (depending on their copyright licences and terms of use) right here.

So far i've been able to play bad apple without mistakes...at the correct speed...with only one or two slowdowns where I keep forgetting how to move my fingers.


Thursday, January 21, 2016

This week on big fred's cosplay and engineering shop! Death by FEA! Quadcopter Design! Oh my!

This post is...3 months late. I've been lazy. But things are changing. so here it is now, with more stuff than planned!

Dark Repulsor


As per my usual forgetfulness, I didn't take pictures of the beginning of the build. So here is where I started actually taking some.


So I ran into some issues. I tried using the router to get he blade part down to thickness, but being the careless person I am, I mixed conventional cuts with climb cuts. Now, normally climb cuts on a router table are dangerous, but I was cutting through at most 1/8th inch at most, with a tiny half inch bit, so I wasn't too worried. The problem is that, on a climb cut, wood acts a bit like brass, and the bit tends to bite. It bite so much, that the bit can actually get pulled out of the router! This happened a bit here. Since I will have to cast pieces for this sword, I decided to take the repair as a practice in casting. I taped the side and cast resin into the depression. It worked surprisingly well! I did screw up though since I didn't have much 5 minute epoxy left, I mixed it right IN the hole, so I ended up with some uncured resin inside the patch.

So much filler resin!

Then I started scribbling directly on the base of the blade to do the...dragon...decoration...THING.


Which I then imported into Inventor and traced in order to print.

Death by FEA and quadcopter design


GMC-4351, Conception Assisté par Ordinateur; Computer assisted design, my nemesis. Sincerely, this class has been the worst one in my whole program so far. It had promise, and then failed them. It's a 3 credits class, but takes the time investment of at least 6 credits. Not only that, but it is overly theoretical. The teacher really doesn't help; his classes are a mess, his notes are...well, he doesn't get through his notes, but they're more math-heavy than the Kreyzig (A math reference book that pretty much has all the math ever used in engineering). We spent half the semester studying curves (Hemite's splines, Cubic Splines, Bézier curves, B-Splines), and we're barely starting to see the theorethical background of FEA.


There is one good thing coming out of that class though; We have to do a project. Since my partner didn't have an idea, and because we have so many people from GAUL doing analysis on the rocket, I convinced him that we should design my quadcopter's frame. So instead of just rule-of-thumb designing it, we'll be doing proper FEA on it, so that's cool. It'll also force me to actually work on it...which...erm, I was about to do! I swear! I wasn't looking at batteries for the Mango Scooter! Nope! Not at all

To simplify the design, because at first the teacher hinted that we'd have to do some FEA by hand...or at least build the general rigidity matrices by hand, we went with everything being straight;

Von Mises equivalent stresses on the MK1 structure
MK1 was way too flexible for my taste. Everything was 3mm thick carbon-fiber-isotropic-equivalent, in order to simplify stress calculation and then do a layup based on the "flow" of those stresses. So we added a stringer on each side of each arm. Here's the displacement on the final MK3:


Mango Scooter

Or maybe I was looking at batteries...$300USD of batteries...and that would only give a...humm...let's see, 37 Volts motors = 10 S, 70 Amps/ 10*2.2Ah = 1/3.18 hours...or about 18 minutes...for 400 moose dollars(more like 500 as of the posting of this) of cells. That would be at full power though, so...realistically...maybe 30 minutes? Maybe I should just buy a hoverboard

2016 goals so far

After 3 weeks, those started badly. So far it's easy to do the time on rocksmith and my Ocarina practice. The 10 exercises are a bit harder. I should've decided on a time of study per week instead, which could have included reading books, doing exercises, studying with flash cards, and so on. So far, I've skipped every calculus exercises, concentrating instead on Linear Algebra. I've been reading Gilbert Strang's book on Linear algebra, along with watching his lecture on computational science and engineering (18.06 and 18.085 on MIT's OCW). For programming practive, i've been using CodeWars. So far i've been doing problems in Python...but I can't wait for C and C++ to be added to that website!

I also started slowly translating SPARC's rules in french in order to maybe try starting something in the area...maybe.


Thursday, December 31, 2015

Happy new year! Of goals, robots, rockets and motivation.

2015 has been...a year.

I did and lost the best job I ever had. Working with FIRST and the Jean-de-brébeuf students have been, not only the closest I've been to actual engineering, both the project management aspect and the design aspect, but also the most fun I've had in a job...no matter how I often felt like a headless chicken...on fire.

I also got to meet great and fun and motivating and nerdy people by joining GAUL. I've been wanting to join for a while, since it's inception actually. But back then I thought I was too green, not knowledgeable enough about...well, anything related to engineering. Now I know it actually kind of was the same for the founders!

I've had 3 goals this year;
I failed at doing the first and the last ones...

But I did do better academically! Only marginally, but I believe I know what my problem is. I've never been actually GOOD at math. I'm at most okay...compared to other engineering students. 

I've also managed to finish a few long projects: Cleaning my workshop and building a new table, Elucidator and it's scabbard, which I had been working on for years...and other stuff, i'm sure.

This brings us to this year's goals. I've been weirdly motivated to improve myself during this holiday, beside a short 4~5 days depression.


As such, I started watching MIT opencourseware classes on youtube, restarted practicing guitar and ocarina, and cleaning up my workshop. I've also decided to set a list of goals for 2016. Goals, not resolutions, which means my list has to have quantitative things in it, and not just "be better at math durrr hurr"

So withouth further ado, here is my list of Goals for 2016:

Engineering:
  • Be better at Math
    • Review Linear Algebra, do 10 problems a week from kreyszig and cegep book
    • Review Calculus, do 10 problems a week from the kreyszig
    • Study discretization and equation-setting in mechanism
  • 1h of programming practice a week
  • Finish Re-entry Simulator
  • Review Dynamics
  • Design a High powered rocket for VIPE 2016 (July ish?)
  • Design a combat robot and an Arena

Cosplay:
  • Finish Kirito
  • Monster hunter foam build (Full armor set + weapon)
  • Spacegun (Warframe/Borderlands)
  • Lightsaber with sound effects


Life:
  • 30 minutes of Rocksmith every 2 days
  • 30 minutes of Ocarina practice every 3 days, once a week without fingering chart
  • Build 1 plane from the book “Planes A complete history” every week
  • Read a novel every 2 months


I
With that, I've also created an Excel Spreadsheet to keep track of everything that has a X/week, so I can hit myself at the end of the year for not following it!

Finally, I have a post I should be finishing about Dark repulsor (Which i've been working on a bit) and my FEA class. If my cold continues, it should be done by next week!(the post, not my class and my prop) I could have done it first, but then, new year is today, not next week.

Happy new year everyone!


Sunday, October 11, 2015

This week on Big Fred's Cosplay and Rocket Shop

ok...not really week, but who keep counts, right?

Elucidator Scabbard

After having finished Elucidator, I decided to give a try at making my own scabbard. As with any project where you make something for the first time, research is key. Thanks to our overlords at google, I found this page describing two historical, and an easy method of making scabbards.

http://www.yeoldegaffers.com/project_scabbard.asp

So, because I'm a bit lazy, I decided to go with the easy method.

First I made the rough shape.


Then I used scrap pieces to build the details. I also thinned the piece near the opening because it looked even fatter than your mom Weird Al in "Fat"


And the final result.

Now, those make it look like everything went well, but it didn't. At first, because of the thickness of the felt I lined it with, it was way toot tight, to the point where paint on the sword itself would get scrapped off. The only way I found to fix it without opening the whole thing, or sanding the whole sword ~1mm thinner, was to get a rough piece of wood, a whiff thicker than the sword was, and repeatedly insert that...implement, in the scabbard. As a result, some fiber on the felt stuck on the wood, and after a while, removed just enough for the sword to have a tight fit, without destroying the paint.


Dark Repulsor

Just a quick glimpse of what I'm working on. I'll probably be making it during the October school break, in between researching on carbon-fiber layup and CFD on rocket bodies.


Speaking of rocket bodies...


ROCKETS!

Since the FIRST robotics team I was managing doesn't exist anymore due to budgetary constraints, I decided to join a student project group once again. I was torn between Avion Cargo Laval, the  SAE Aero design group, which really need more people, Robocup, a project to make a team of robots that plays soccer, with one of my friend, or the GAUL, which I actually wanted to join since they started up again a few years ago, but thought I was too inexperienced to join.

Since it's my last year and a half of university, in theory, I decided to not help my old team, or my friend. Instead, I decided to do what I always wanted to do; what actually put me on the path to being an engineer: rocket science.

The first team activity we did was build rockets together. We had a choice to either work on a team rocket, or get our own kit. Since I like diving in the deep end on my first try, and I really like making stuff, I got my own kit. I'm cheap though, so I went with the cheaper, smaller kit, called the Screech, thinking it would be a one time thing and that it would either break, get lost, destroyed, or that i'd have my fill with that one and the competition's rocket...

The completed rocket, Thjalfi-1, pronounced Thyalfi, just like Mjollnir is pronounced Myollnir and eyjafjallajokull is pronounced eiyafyallayokul.
Boy was I wrong. We went to Ciel d'Octobre and the rocket launching community seemed just so nice compared to the RC plane community. We launched 5 rockets in total, mine and another small kit like mine, the communal DX-1, and 2 rockets made by the team's senior launchers. My launch didn't go so well: first the wind got pretty strong near the end of the day, so we angled the launch pad maybe a bit more than we should have. Then, my color choice wasn't so great. Chrome is actually hard to see against a cloud cover AND cut corn, so everyone lost sight of the rocket at it's apogee. Finaly, the parachute didn't deploy properly: the nose was probably a bit too tight. I was afraid that was going to happen, because it was really tight...but since it was my first rocket, I really didn't know how tight it had to be. In any case, that is only conjecture because we didn't find the rocket in the end; maybe the chute did deploy and we just didn't see it; maybe it deployed but was burned by the explosive charge maybe...

I didn't see any cows, that's proof right?
In any case, that was fun. It reminded me of my youth, launching model rockets in the sand quarry in my hometown. I'm not satisfied with my launch though. I'm going to build a bigger rocket for next year, and get the certifications needed to launch it.

Welp, add rocketry to my infinite list of hobbies...which really could mostly be summed up as:
My wallet ._.;

AND IN THE NEXT EPISODE! WILL ROCKET CFD BE AN ACTUAL THING? WILL FRED BE ABLE TO FINISH HIS COSPLAY ON TIME? OR WILL HE BE KILLED BY THE OVERWHELMING COMPUTER-AIDED DESIGN CLASS?? FIND OUT...SOMEDAY.